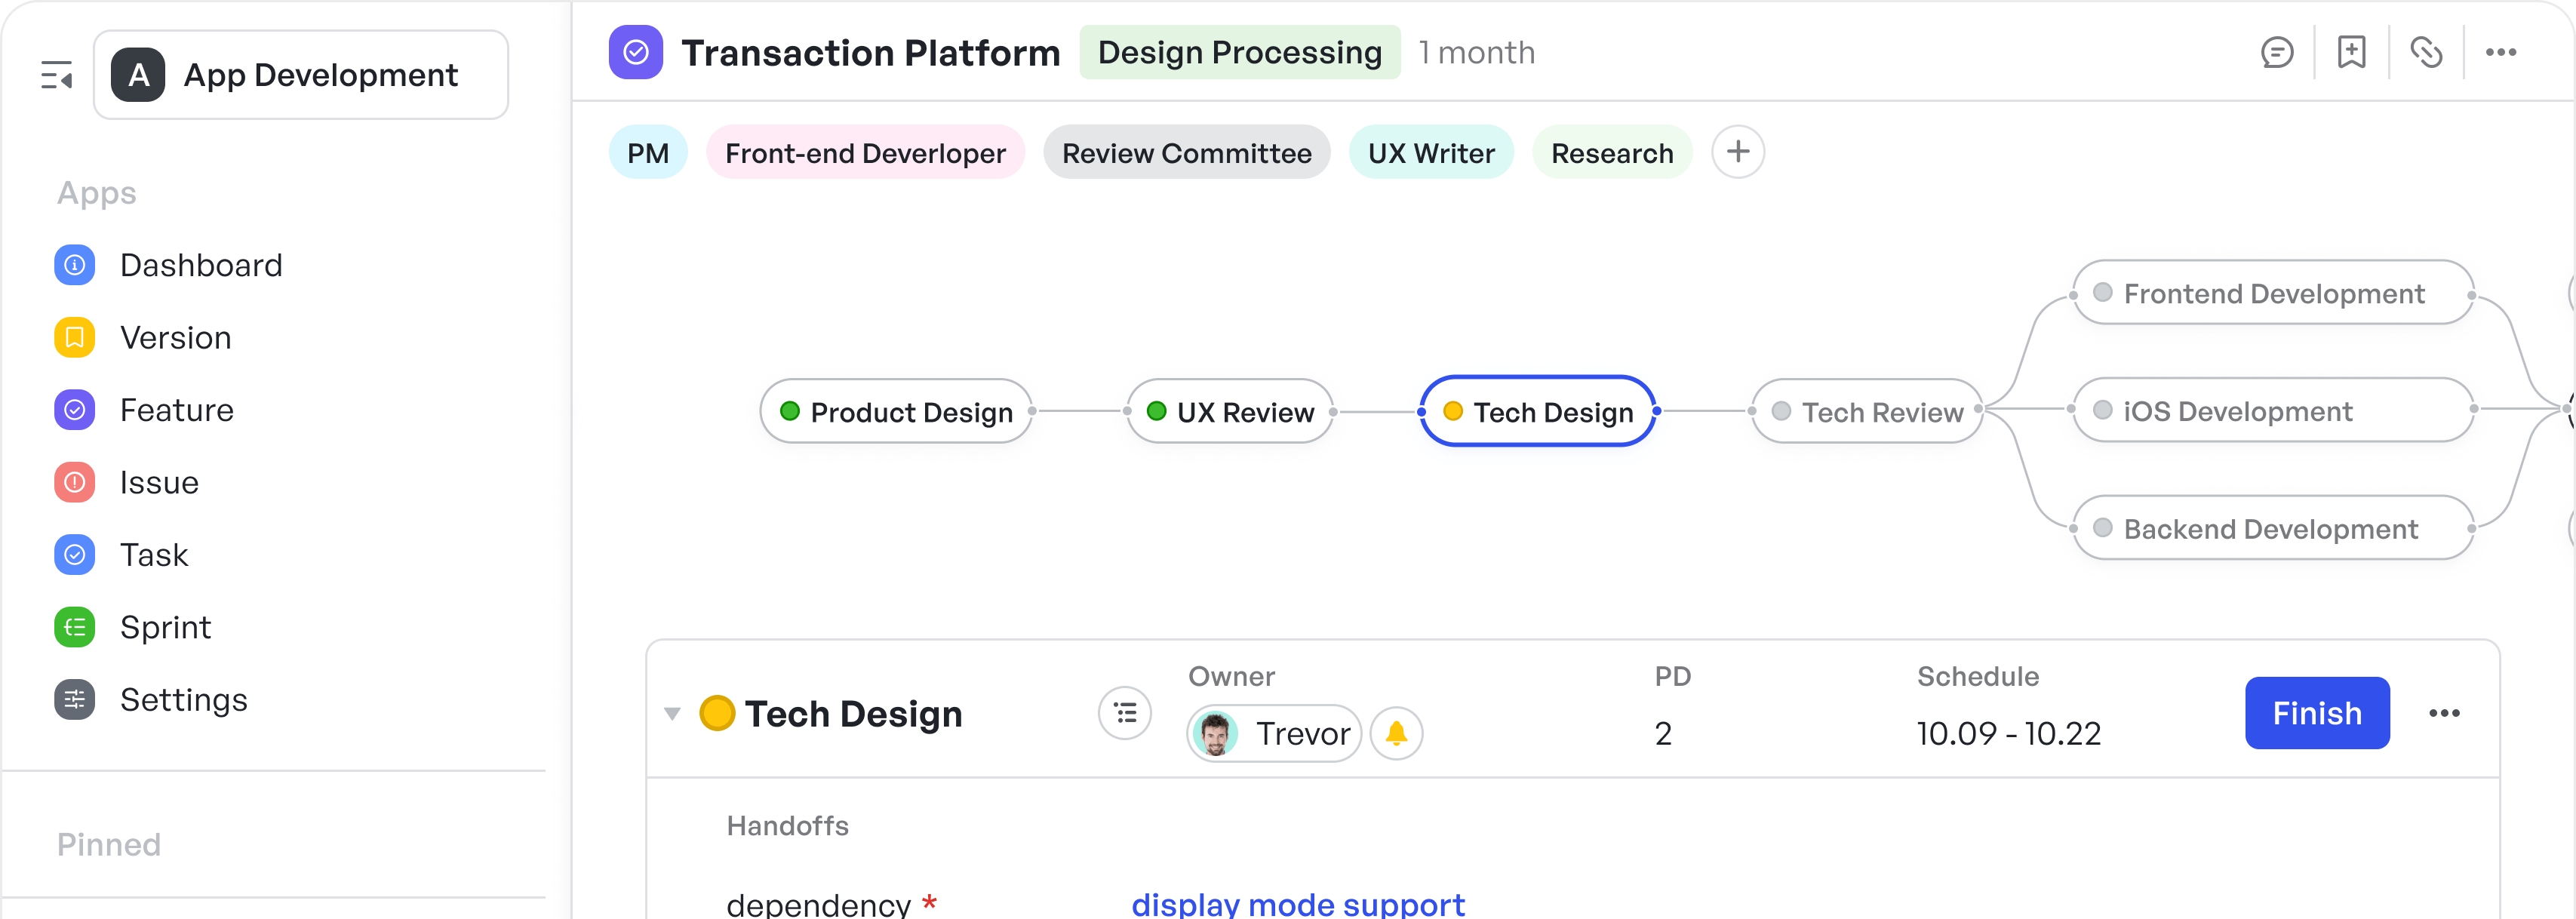
What Is a Product Requirements Document (PRD)?

Nothing slows down a sprint faster than conflicting priorities, and it usually traces back to one thing: the absence of a product requirements document (PRD).
In fact, in ProductPlan’s 2023 report, over 50% of large product teams (50+ people) said their biggest growing pain is keeping roadmaps and processes consistent – a gap a PRD is designed to fill.
Let's start with an example.
Two weeks into the Q2 onboarding sprint, the product manager noticed:
- The dev team was deep into building a referral tracker.
- The designer had just shared mockups for a progress dashboard.
- The CEO was asking when the new Slack integration would be ready.
Faced with three features, each with its own priority, the product manager must make swift, strategic decisions to keep the project on track. More often than not, this misalignment often boils down to one missing link: a solid product requirements document (PRD).
A PRD is far more than a simple document used to check off features. It aligns product teams, stakeholders, and developers, serving as a roadmap for successful product development. In this post, we’ll break down:
- What goes into an effective PRD
- Why it keeps product teams aligned
- How to write one that actually works
- How teams can use Meegle to build, manage and execute PRDs
Let's get started.
What is a product requirements document (PRD)?
A product requirement document (PRD) is a clear, detailed document that outlines what a product or feature should do, who it is for, and how it supports the company’s goals. Generally, in product management, the PRD serves as a blueprint. It guides teams by spelling out the product’s purpose and priorities, ensuring every feature and decision aligns with the end goal.
Without it, teams can waste time chasing misaligned ideas or building features that don’t deliver value.
 Illustration of a PRD
However, it is important to note that PRDs can look different across industries but serve the same core purpose:
- In e-commerce: A PRD can focus on increasing discovery of independent artists by 40% while maintaining commercial viability for marketplace recommendations.
- In fintech: A PRD can emphasize rapid response times (under 2 seconds) and rigorous security compliance as non-negotiable requirements for a card freeze feature.
- In healthcare: A PRD for patient intake workflow can prioritize HIPAA compliance and accessibility requirements above all other features.
Before we go deep into what's in a product requirement document, let's look at why a PRD matters and what happens when you skip it.
Why are PRDs important for product teams?
A well-crafted Product Requirements Document (PRD) is essential for product teams because it turns abstract ideas into actionable direction. Its importance lies in the following:
- Establishes strategic alignment: It ensures that every stakeholder – across product, design, engineering, and business – shares a unified understanding of the problem space, target user, and intended outcomes.
- Defines scope and constraints with precision: By clearly articulating what’s in scope, what’s out, and the non-negotiable constraints (technical, legal, or UX), a PRD reduces ambiguity and limits the risk of scope creep.
- Brings product vision and implementation together: It translates high-level objectives into detailed functional and non-functional requirements, creating a tangible roadmap that developers and designers can confidently execute against.
- Supports prioritization and trade-off decisions: With documented goals, user stories, and acceptance criteria, teams can objectively evaluate feature trade-offs, manage dependencies, and focus on what drives the most value.
- Enables cross-functional accountability: Clear ownership, timelines, and success metrics embedded in the PRD foster shared responsibility and transparency across departments.
- Acts as a living record: As the product evolves, the PRD becomes a point of reference for rationale behind decisions, rejected alternatives, and agreed expectations—especially useful for onboarding new team members or conducting retrospectives.
In essence, a PRD is a strategic instrument that helps structure your product goals and functionality before the product development process begins, so your team isn’t making it up as they go. This becomes even more important as teams grow.
According to Productboard’s 2022 Product Excellence Report, 48% of product professionals said they struggle most with setting a clear product vision and strategy. A PRD helps teams solve this issue before a single line of code is written.
In essence, a PRD saves time, reduces iterations, and helps teams build the right product, not just any product.
To summarize:
- A Product Requirements Document (PRD) aligns product, design, engineering, and business teams around a shared vision, turning ideas into actionable plans.
- It defines scope, constraints, goals, user stories, and timelines, helping teams prioritize, make trade-offs, and avoids misaligned development.
- Without a PRD, product teams risk conflicting priorities, scope creep, wasted effort, and building features that don't drive value.
- PRDs vary by industry but always ensure clarity and accountability—for example, HIPAA compliance in healthcare or security benchmarks in fintech.
- Tools like Meegle help teams build, manage, and execute PRDs with collaboration, task linking, and workflow visibility.
What is in a product requirements document?
A PRD is not one document; it’s a hub that connects goals, user needs, features, and constraints to guide aligned, focused product development.
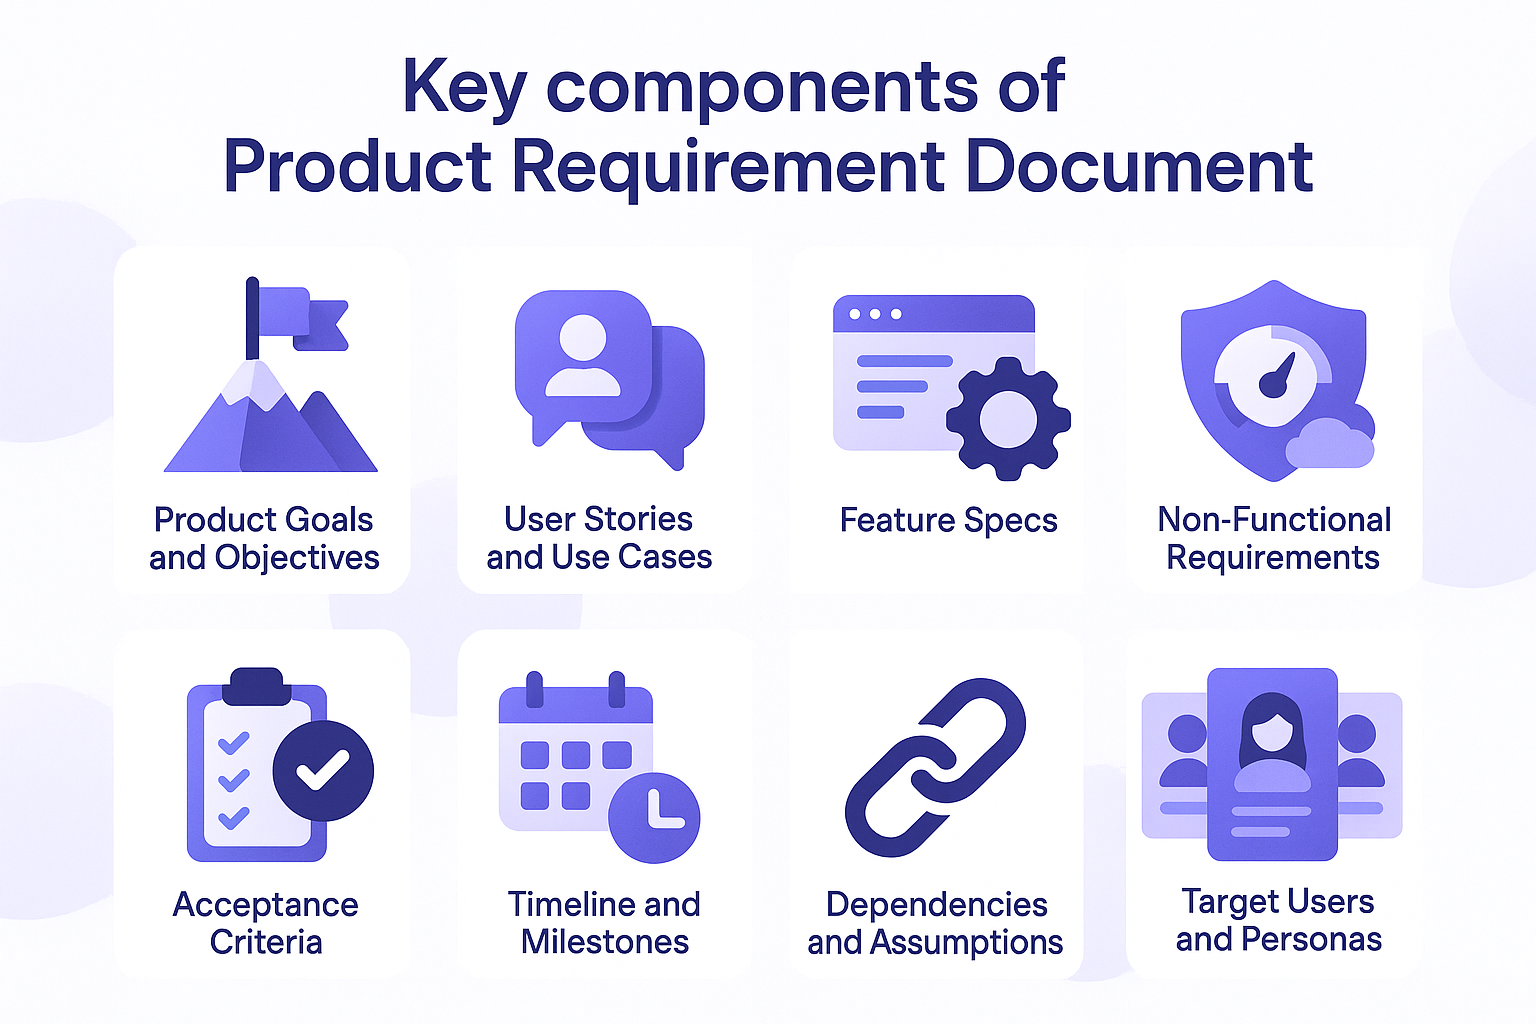 What is in a product requirement document (PRD)
A strong PRD typically includes:
- Product goals: The “why” behind the product, like solving a specific customer painpoint or boosting retention by 10%.
- User stories: Short descriptions of who the product serves and what they need, like “As a new user, I want a simple onboarding flow so I can start using the app quickly.”
- Feature specs: Detailed breakdowns of each feature, including how it works and what it looks like. For example, a referral tracker might specify a button that lets users share a link via email.
- Non-functional requirements: Performance, security, scalability, accessibility, and other quality attributes that dictate how the system should behave under various conditions. For example, “Page load time must be under 2 seconds for 95% of users.”
- Acceptance criteria: Clear conditions that must be met for a feature to be considered complete, like “The referral tracker logs at least 95% of shares accurately during testing.”
- Timeline and milestones: A clear schedule outlining when each feature or phase should be delivered. This helps teams stay on track and stakeholders know when to expect progress.
- Dependencies and assumptions: Notes on anything that must happen before work can proceed (like API access), and assumptions made while planning (e.g. “Users already have Slack installed”).
- Target users and personas: Detailed descriptions of who will use the product, including their goals, behaviors, and pain points. This keeps development focused on real user needs.
Once you know what to include in a your PRD, the next step is putting it into action. Let’s walk through how Meegle helps teams create PRDs seamlessly.
How to create, manage, and execute a PRD with Meegle
Meegle makes it easy to turn your product vision into a clear, organized Product Requirements Document (PRD) your team can actually use.
In the steps below, we’ll walk through how to write a strong PRD using Meegle, with a dev-tool product as our running example to make things concrete and relatable. Here’s how to get started:
Step 1: Define product goals and objectives
Every effective PRD starts with clear goals. Never skip this step. These goals define what the team is working toward and provide direction when trade-offs come up during development.
Begin with conversations
Talk to external stakeholders and your core team – product, engineering, design, maybe support or sales – and ask, “What’s the biggest user problem we need to solve right now?” You’ll likely get a range of answers. That’s good. Your job is to distill those inputs into one or two focused, measurable goals.
Set SMART goals
Instead of vague ambitions like “improve onboarding,” aim for clarity. Set a SMART goal:
- Specific (e.g. “Reduce new-user setup time”)
- Measurable (“…by 50%”)
- Achievable (based on your team’s bandwidth)
- Relevant (ties back to your Q2 retention OKR)
- Time-bound (“…within eight weeks”)
A good example of a dev-tool PRD: "Reduce first-time collaborator setup from 4 minutes to 2 minutes by July 31."
That one line already gives your team direction. It tells engineers to optimize API calls, designers to streamline screens, and QA to measure load times. And it helps you say no to features that don't move that needle – like a Slack integration that’s cool but unrelated.
Once you’ve defined those objectives, go deeper:
- Write a short rationale. Why does this goal matter right now? What problem does it solve for users or the business? A sentence or two is enough.
- Note what’s out of scope. This prevents scope creep. Even just saying, “This doesn’t include cross-platform redesigns” can save hours of rework later.
- Check for measurability. Can you track this? Can someone else verify when it’s done?
To effectively manage and visualize these goals, use Meegle’s node-driven workflow to break down the overarching goal into interconnected nodes representing specific tasks or milestones.
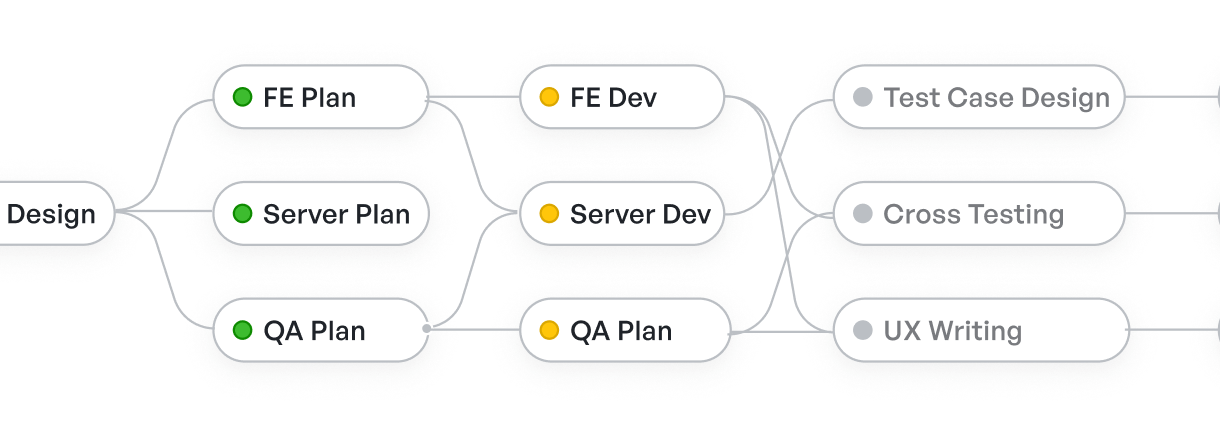 Node-driven workflow
This visual representation helps in understanding dependencies and progress. You ca also utilize custom fields to add details such as priority levels, responsible team members, and deadlines to each node, ensuring clarity and accountability.
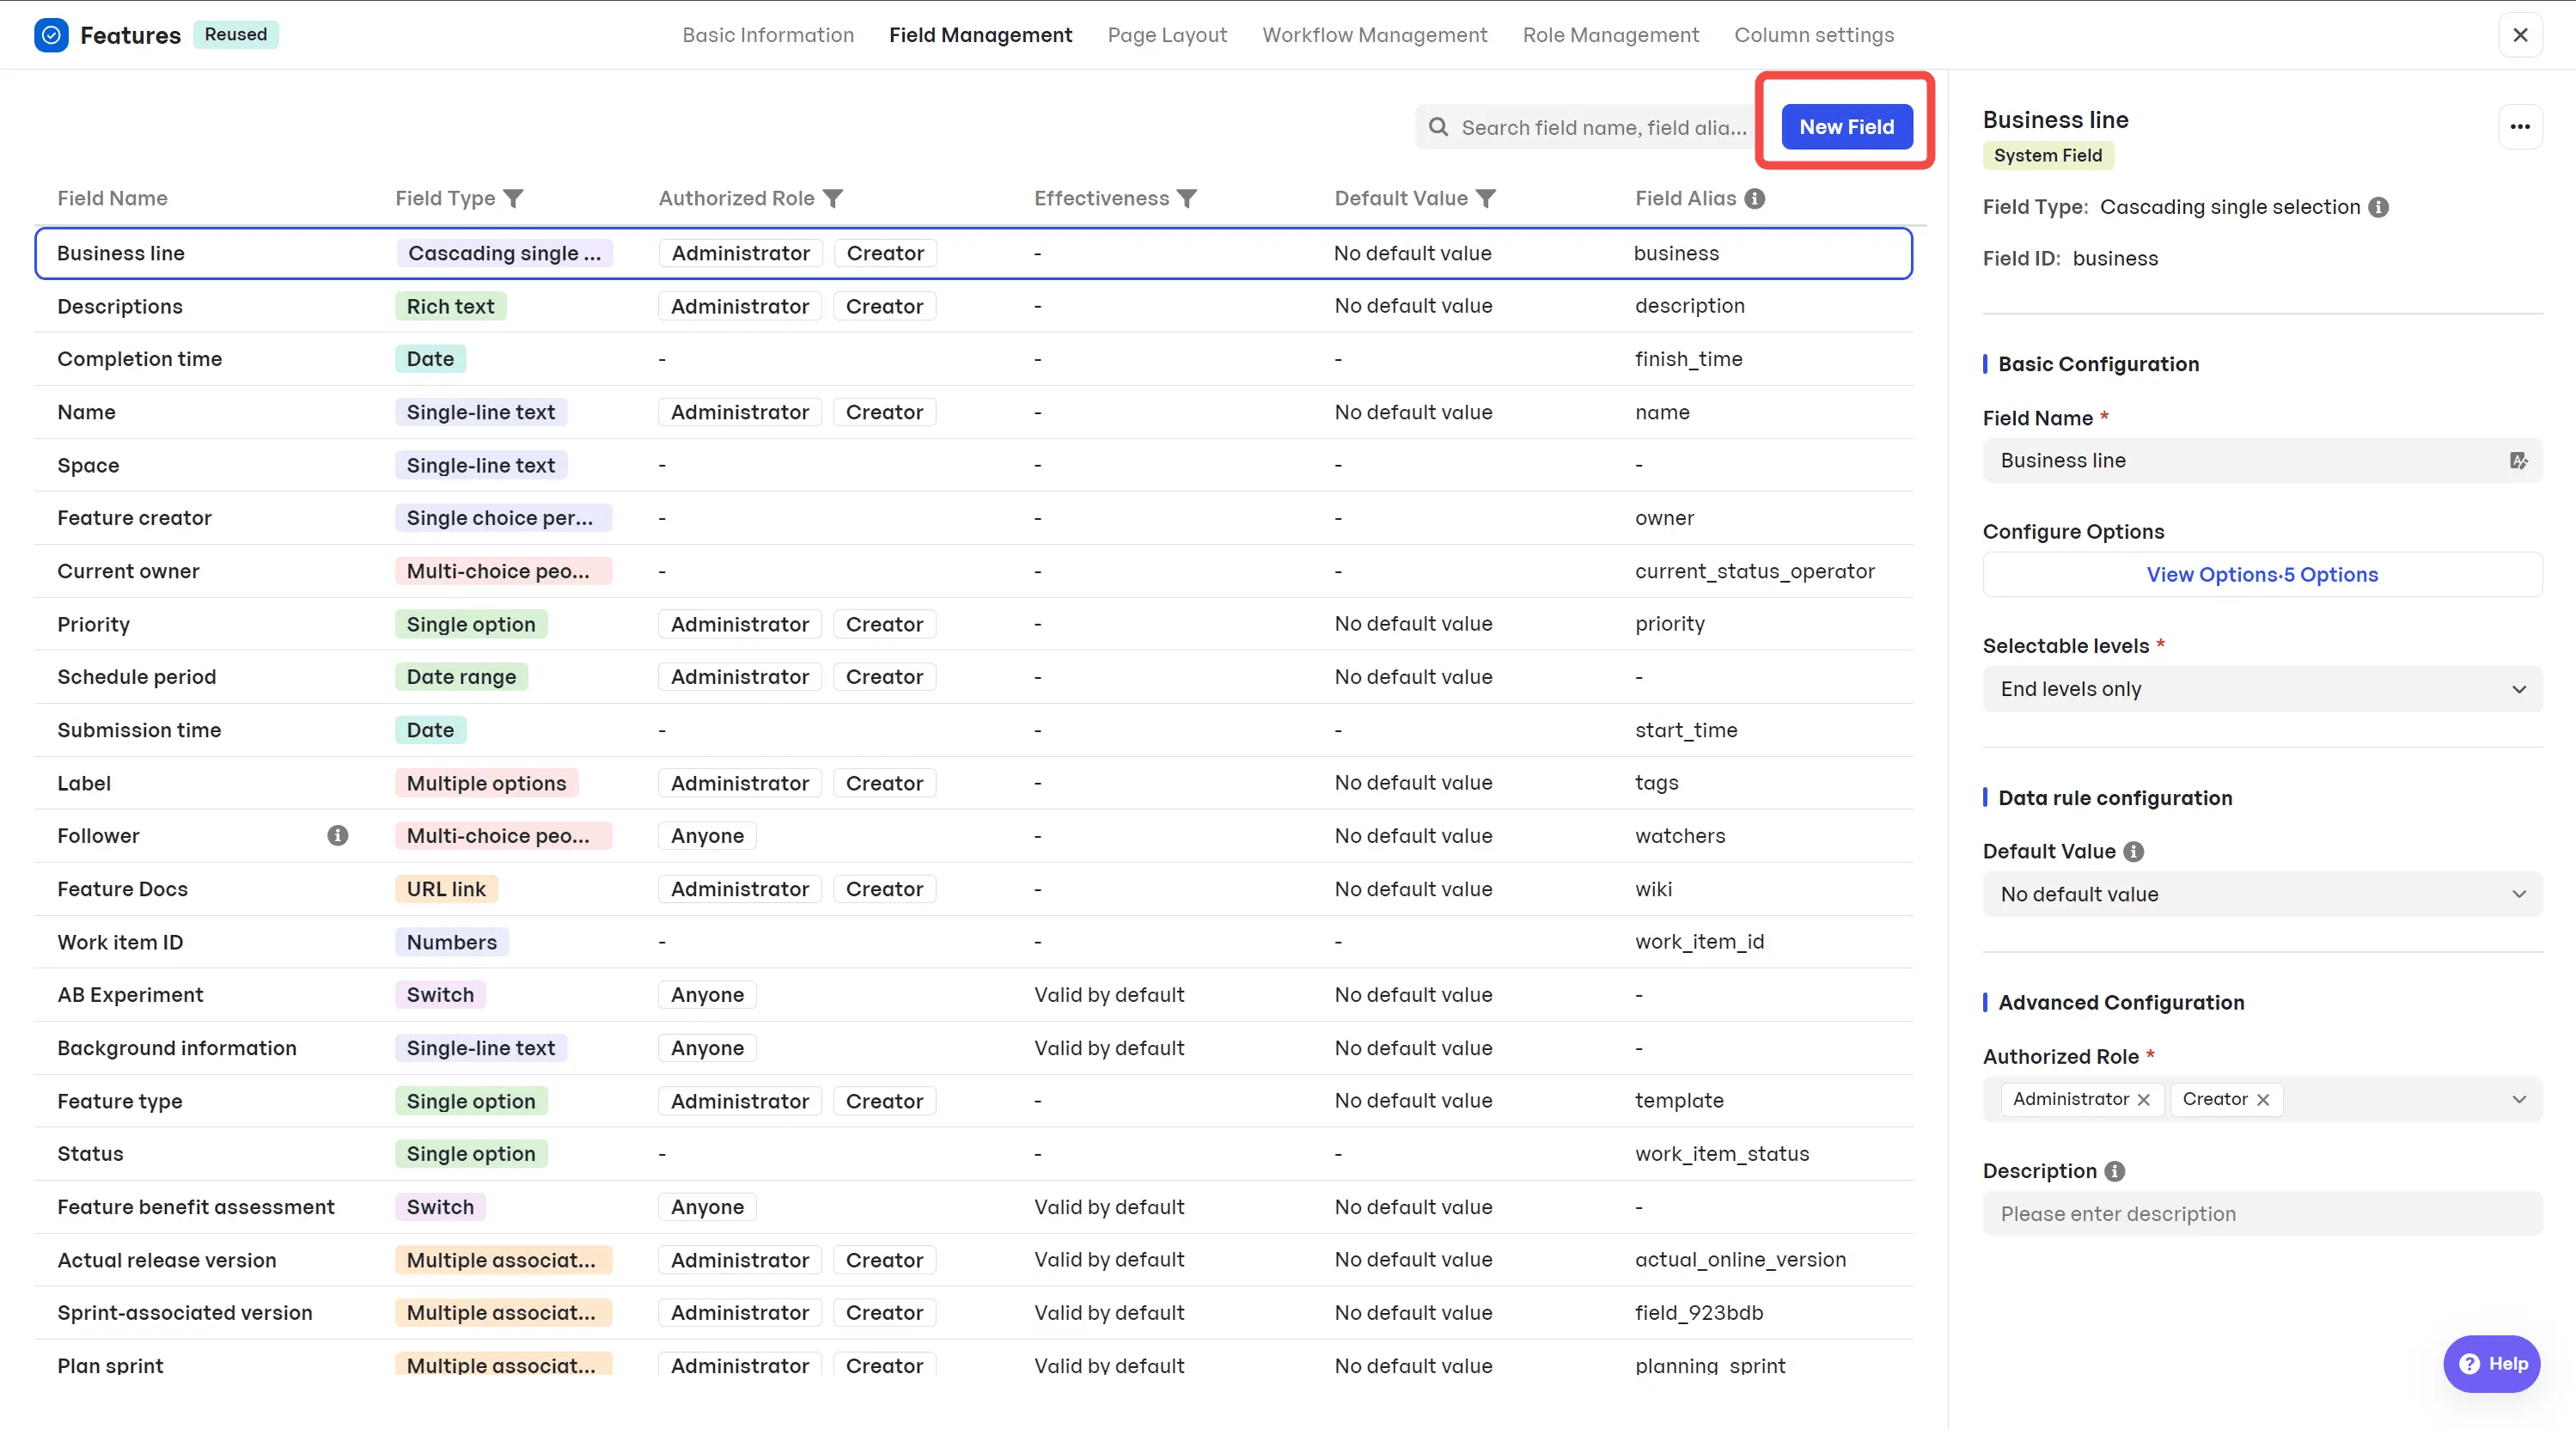 Add new custom fields
Pro Tip: Regularly review and adjust your goals within Meegle to reflect any changes in project scope or business objectives, ensuring continuous alignment and relevance.
Step 2: User stories and use cases
Once your goals are set, the next step in a solid prd is to get specific about who you're building for and what they actually need. A user story describe the user’s point of view. What they’re trying to do, and what’s getting in the way.
Capture core user stories
They follow a simple structure: “As a [user], I want [action] to [benefit].”
For example: “As a new user, I want to see my setup progress so I know how close I am to being fully onboarded.” This line helps the team understand what the feature should support. For this step, start by identifying 2–3 core users. What frustrates them? What are they trying to do? Use short, focused stories to capture these needs. You should avoid fictional personas or long bios, just aim for clarity.
Outline simple use cases
Next, move to use cases. These describe the steps a user takes to complete a task. They’re helpful for clarifying flows and catching unusual scenerios early.
For example: User clicks "Share" → Chooses email option → Sends link and sees a "Sent!" confirmation. No need for lengthy documentation – just enough for your team to visualize the interaction.
Gather cross-functional feedback
Share your draft stories and use cases with designers, engineers, support, and marketing. Their input uncovers missing details and ensures everyone shares the same understanding.
With Meegle’s centralized dashboard, create a "User Stories" work item.
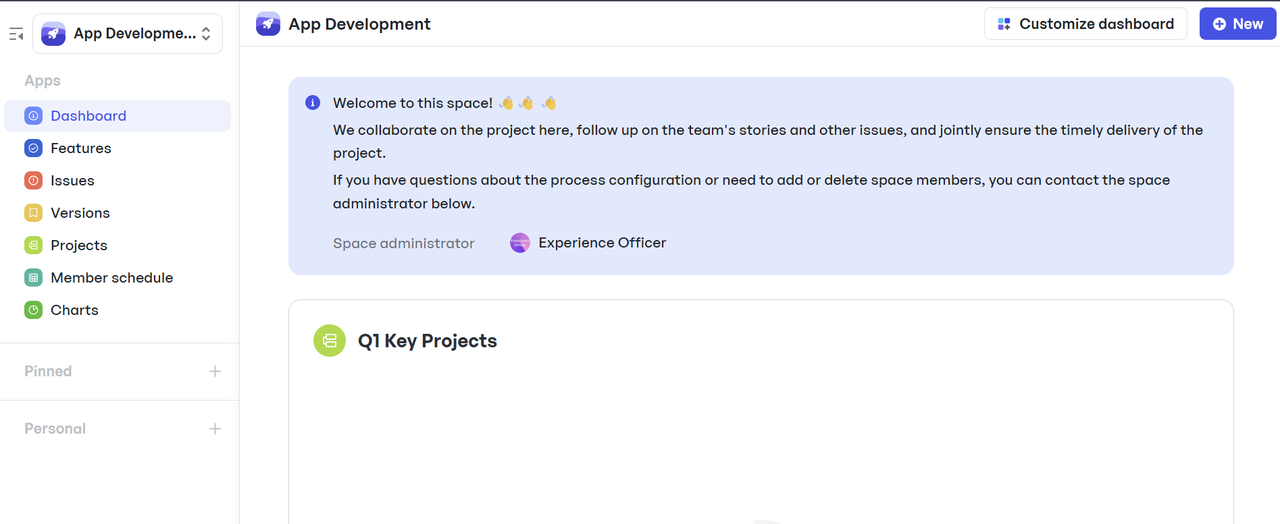 Centralized space dashboard
For each story, attach:
- Acceptance checklists for validation
- Linked mockups or flow diagrams
- Tags for user type or priority.
Also, team members can comment in real time using Meegle’s Inbox, and you can use @mentions to ask for specific feedback.
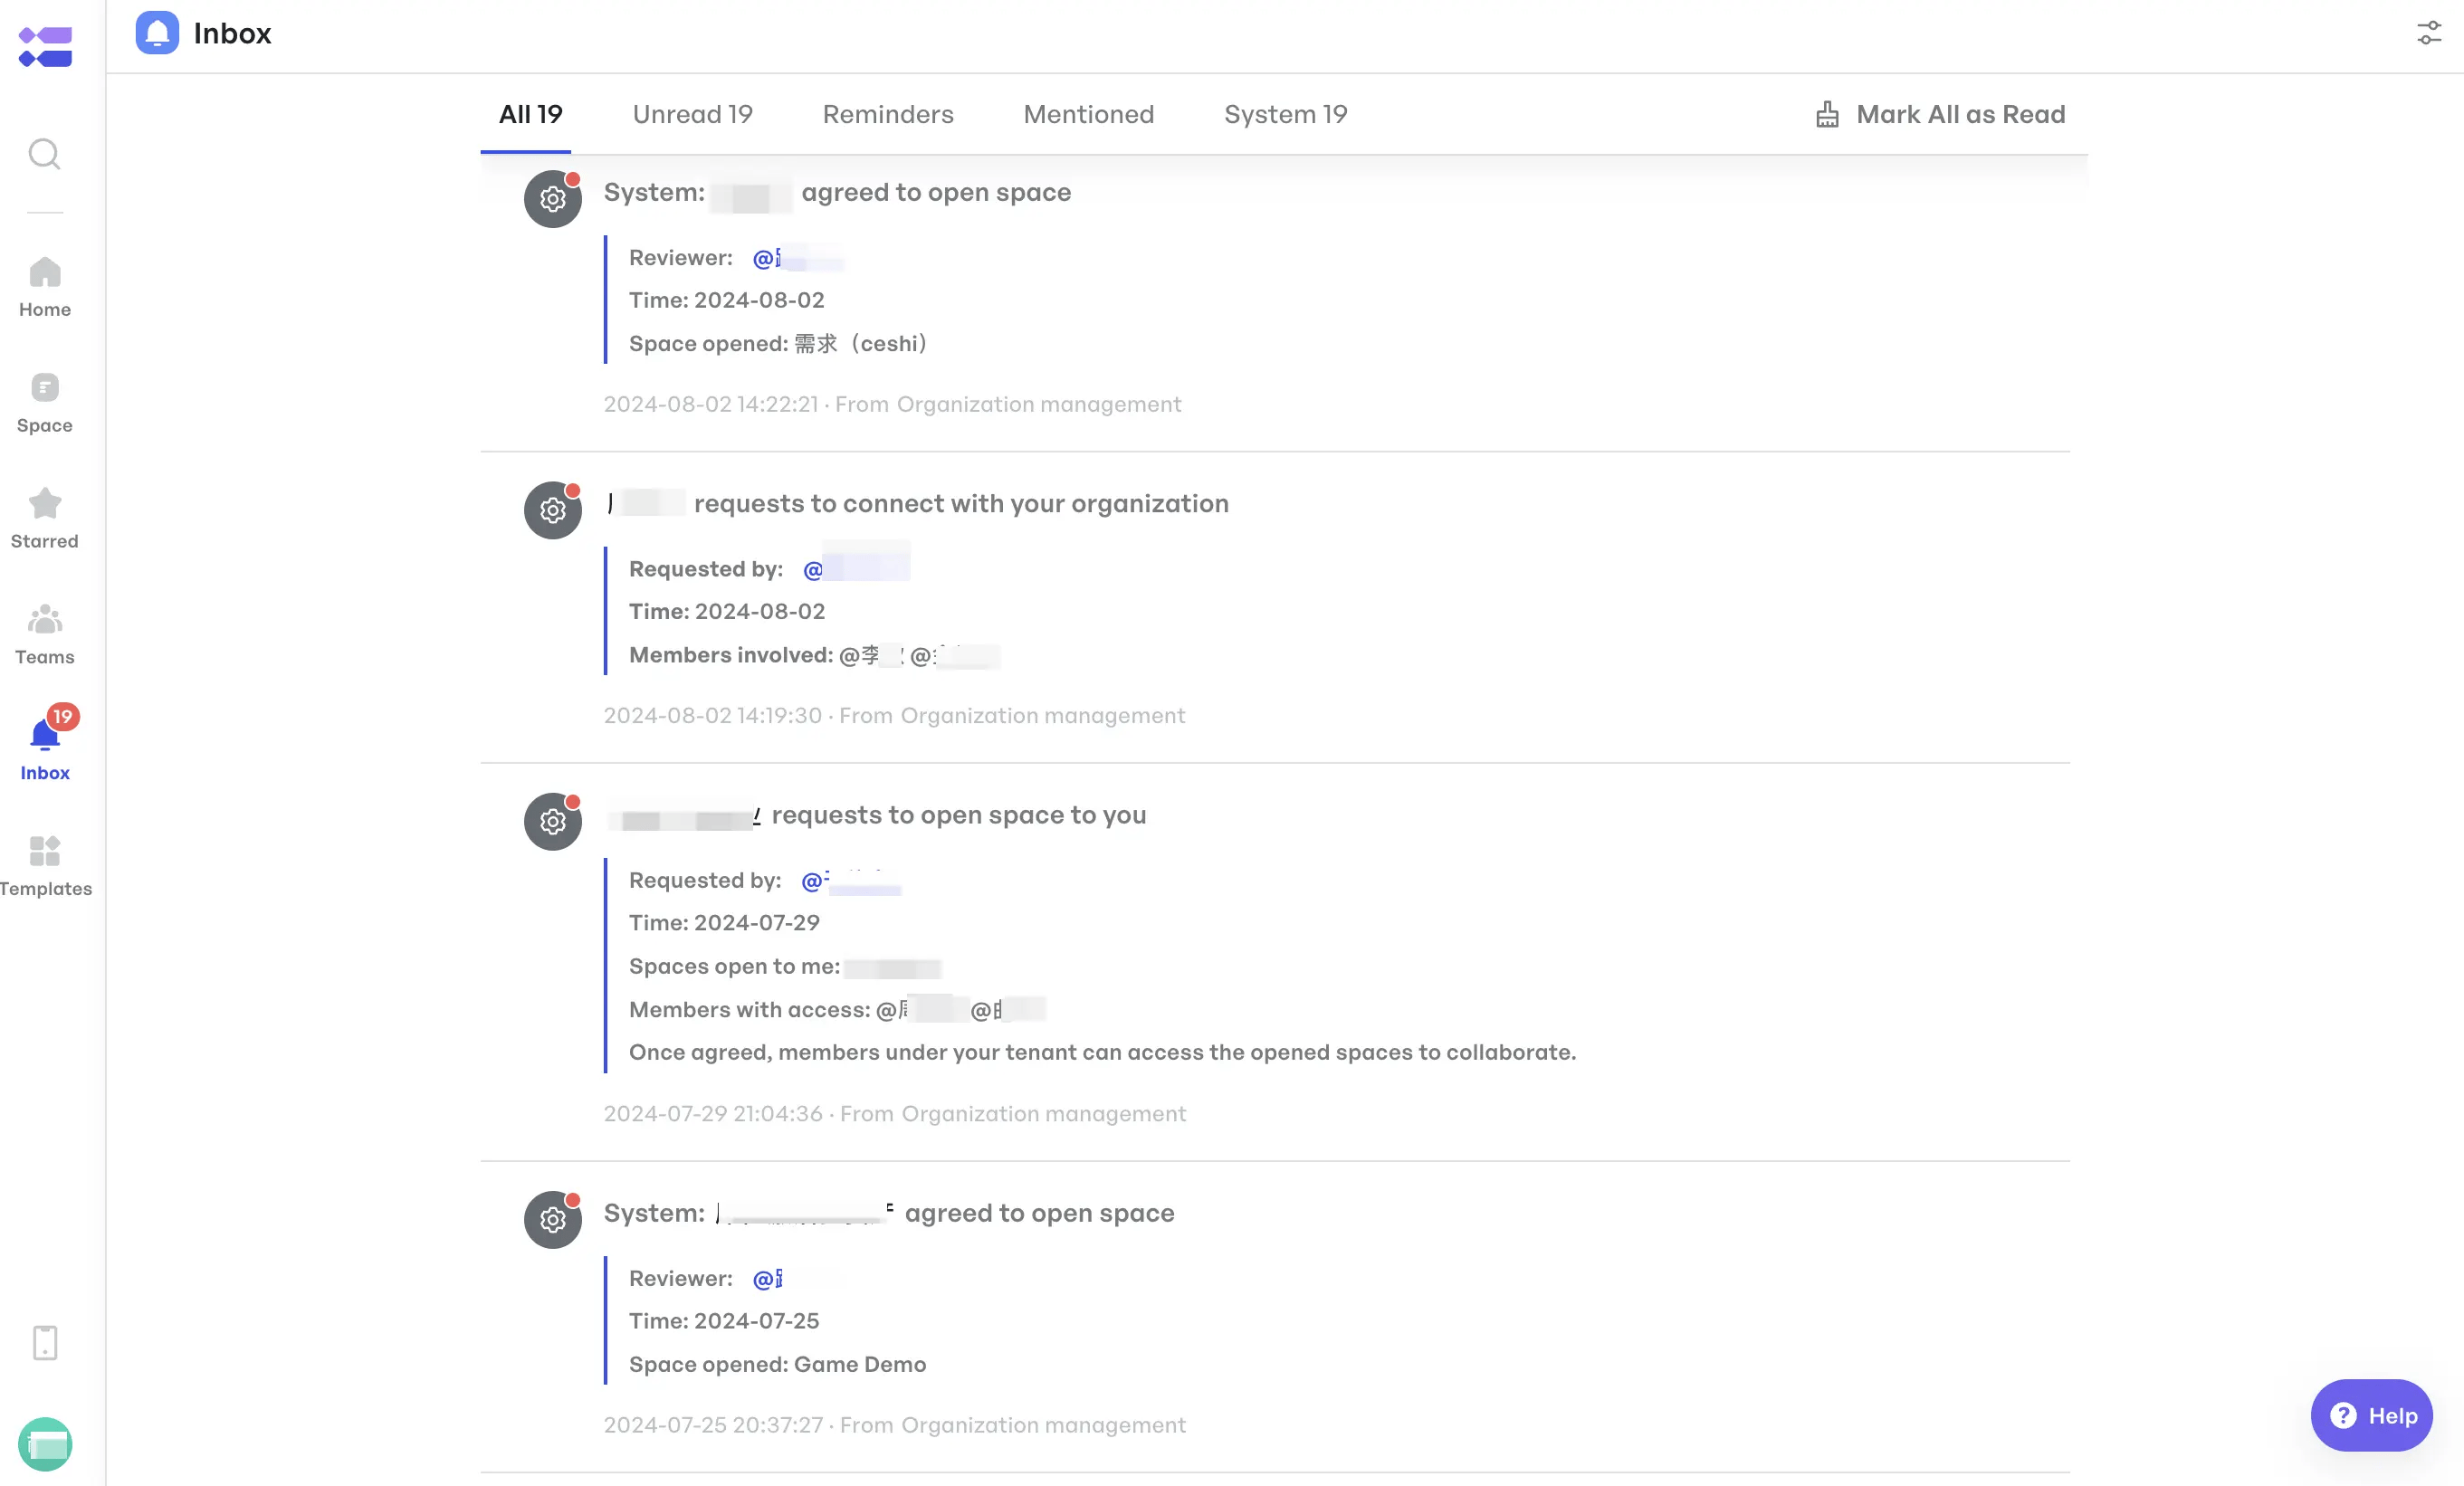 Use meegle's Inbox to communicate with team members
As stories move from draft to approved, adjust the tasks current state (To Do → In Review → Approved) using different Views so progress stays visible.
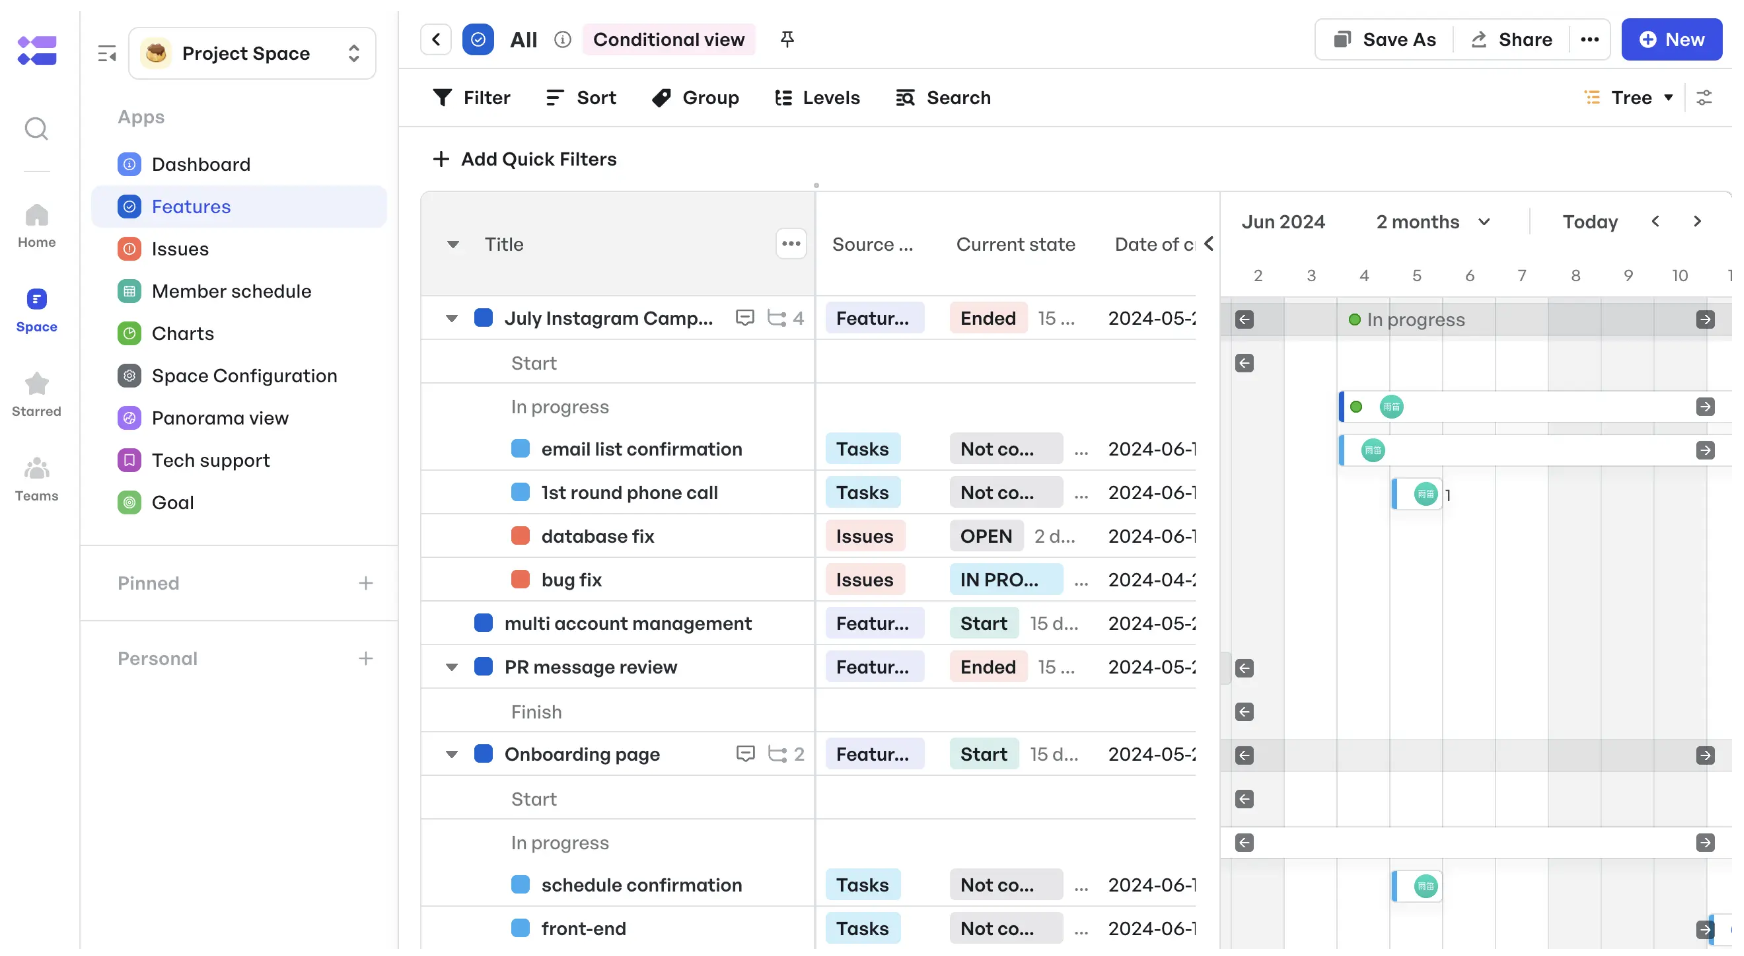 Visualize and adjust current tasks with Tree View
This structure ensures that user needs don’t get buried in chat threads or spreadsheets. And when it's time to scope features, you’ve already captured the intent behind it.
Pro Tip: Limit yourself to 2–3 focused user stories per feature. Too many dilutes effort; too few risks missing key scenarios. Use Meegle’s comment threads to refine quickly without losing context.
Step 3: Feature specs
Once you've captured user stories and use cases, it's time to turn those needs into helpful features. A good feature spec answers one simple question: What exactly are we building?
Identify specific feature component
Begin this step of the product requirement document by breaking each feature into specific components and making sure you go beyond high-level ideas.
For example, if you're designing a progress bar, the spec should never say “enable sharing” – it should explain how users share, what they see, and what happens afterward.
You should describe:
- Trigger: When and where the bar appears (e.g., “On the onboarding screen after account creation”).
- Behavior: How it updates (“Fills in 20% increments as each step completes”).
- Design notes: Size, colors, labels, and any animation.
- Edge cases: What happens if a step fails or the user refreshes mid-flow.
The point isn’t to overwhelm your team with detail. It's to make sure everyone sees the same picture in their head. Developers know what to build. Designers know what to wireframe. QA knows what to test.
Fewer assumptions, fewer surprises.
Next, use Meegle’s feature management template to capture all these details in one place.
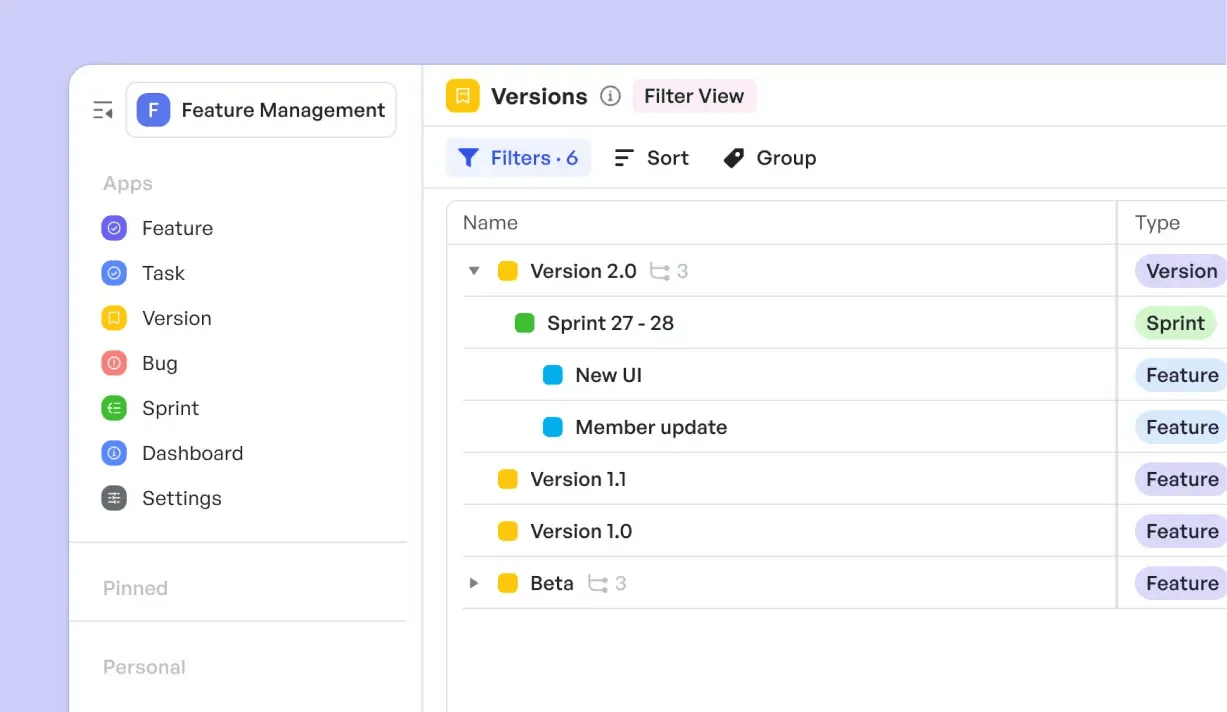 Feature management template
Each spec can be saved as a work item with dedicated fields for description, design attachments, and data requirements where you can:
- Upload visual assets (screenshots, mockups, or even Figma links)
- Link related user stories or dependencies
- Assign roles (contributors or reviewers)
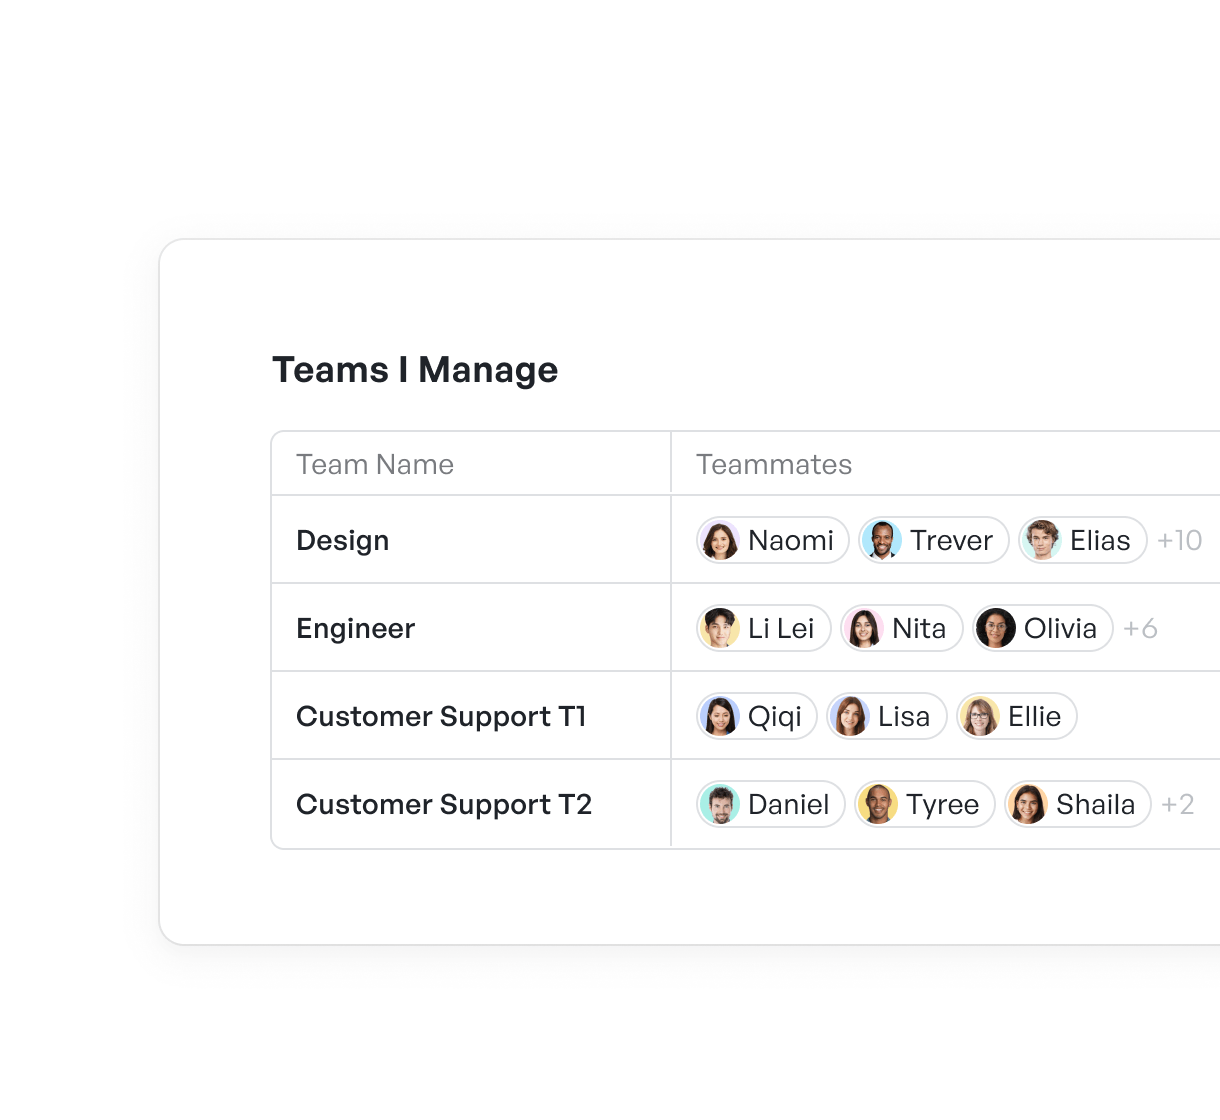 Assign roles for tasks
This all lives in one space dashboard, so when you revisit a feature weeks later or hand it off to another team member, everything stays still clear and traceable.
If you're not sure how much to include in a spec, use this rule of thumb: Could someone build or test this without asking you questions? If not, go into more details.
Pro Tip: After drafting your spec, review it with your team. Walking through the flowchart together uncovers hidden questions and aligns everyone on the feature’s intent.
Step 4: Outline Non-functional requirements
Beyond what your product does, you need to spell out how it performs. Non-functional requirements cover aspects like speed, security, reliability, and compliance. Criteria that users may not see directly but will certainly notice if they’re missing.
Start by listing the key categories for your feature or product:
- Performance: how fast pages load
- Security: how data is protected
- Scalability: how the system handles growth
- Compliance: GDPR, accessibility.
For each category, turn your concerns into clear, testable statements. For example:
"Page loads in under 2 seconds for 95% of users,” or “All user data must be encrypted at rest and in transit."
Next, add context so your team knows why these non-functional requirements matter. A brief note like, “Fast load times reduce user drop-off during onboarding,” or “Encryption protects us from data-breach liabilities,” ties each requirement to real user or business risks.
In your PRD, group these into their own section. Don’t bury them inside feature specs. That way, non-functional needs stand out and get the attention they deserve.
To make this process easier, capture each non-functional item as its own work item. You can add fields for target metrics, priority, and owner, just like you do for features.
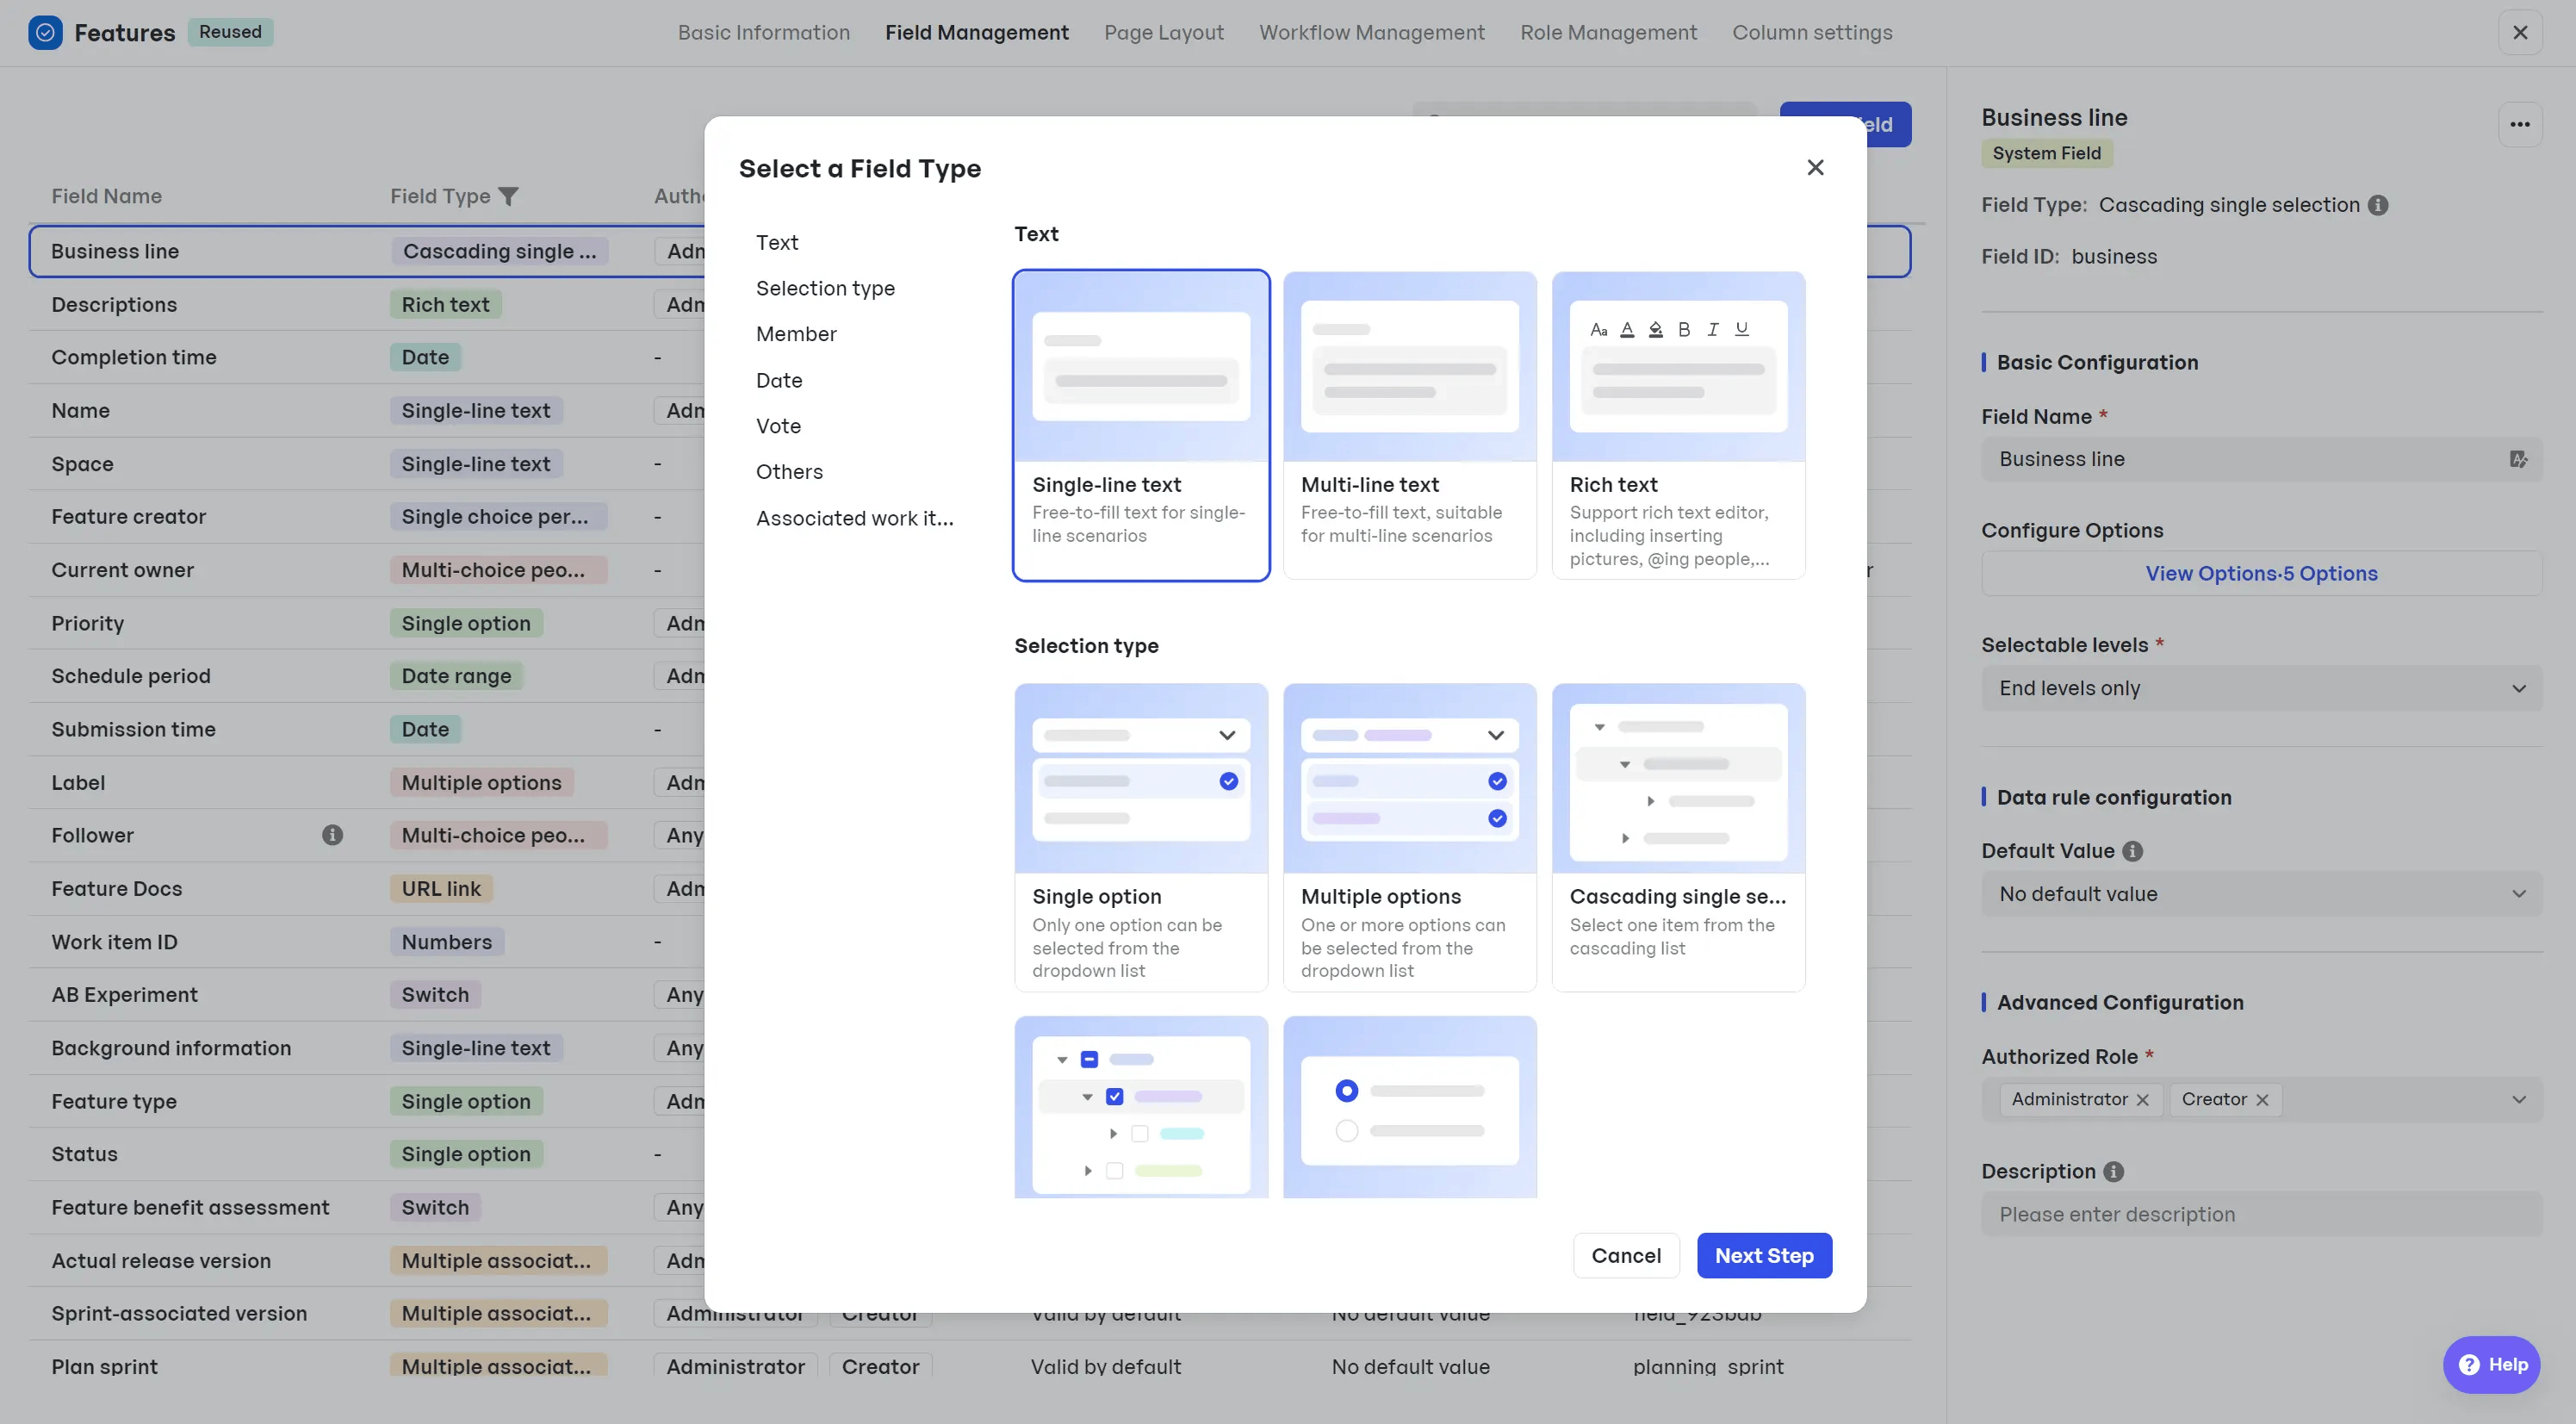 Field Type available
 Message the appropriate technical leads or security experts in your team from the comments to gather their input and validate your thresholds collaboratively.
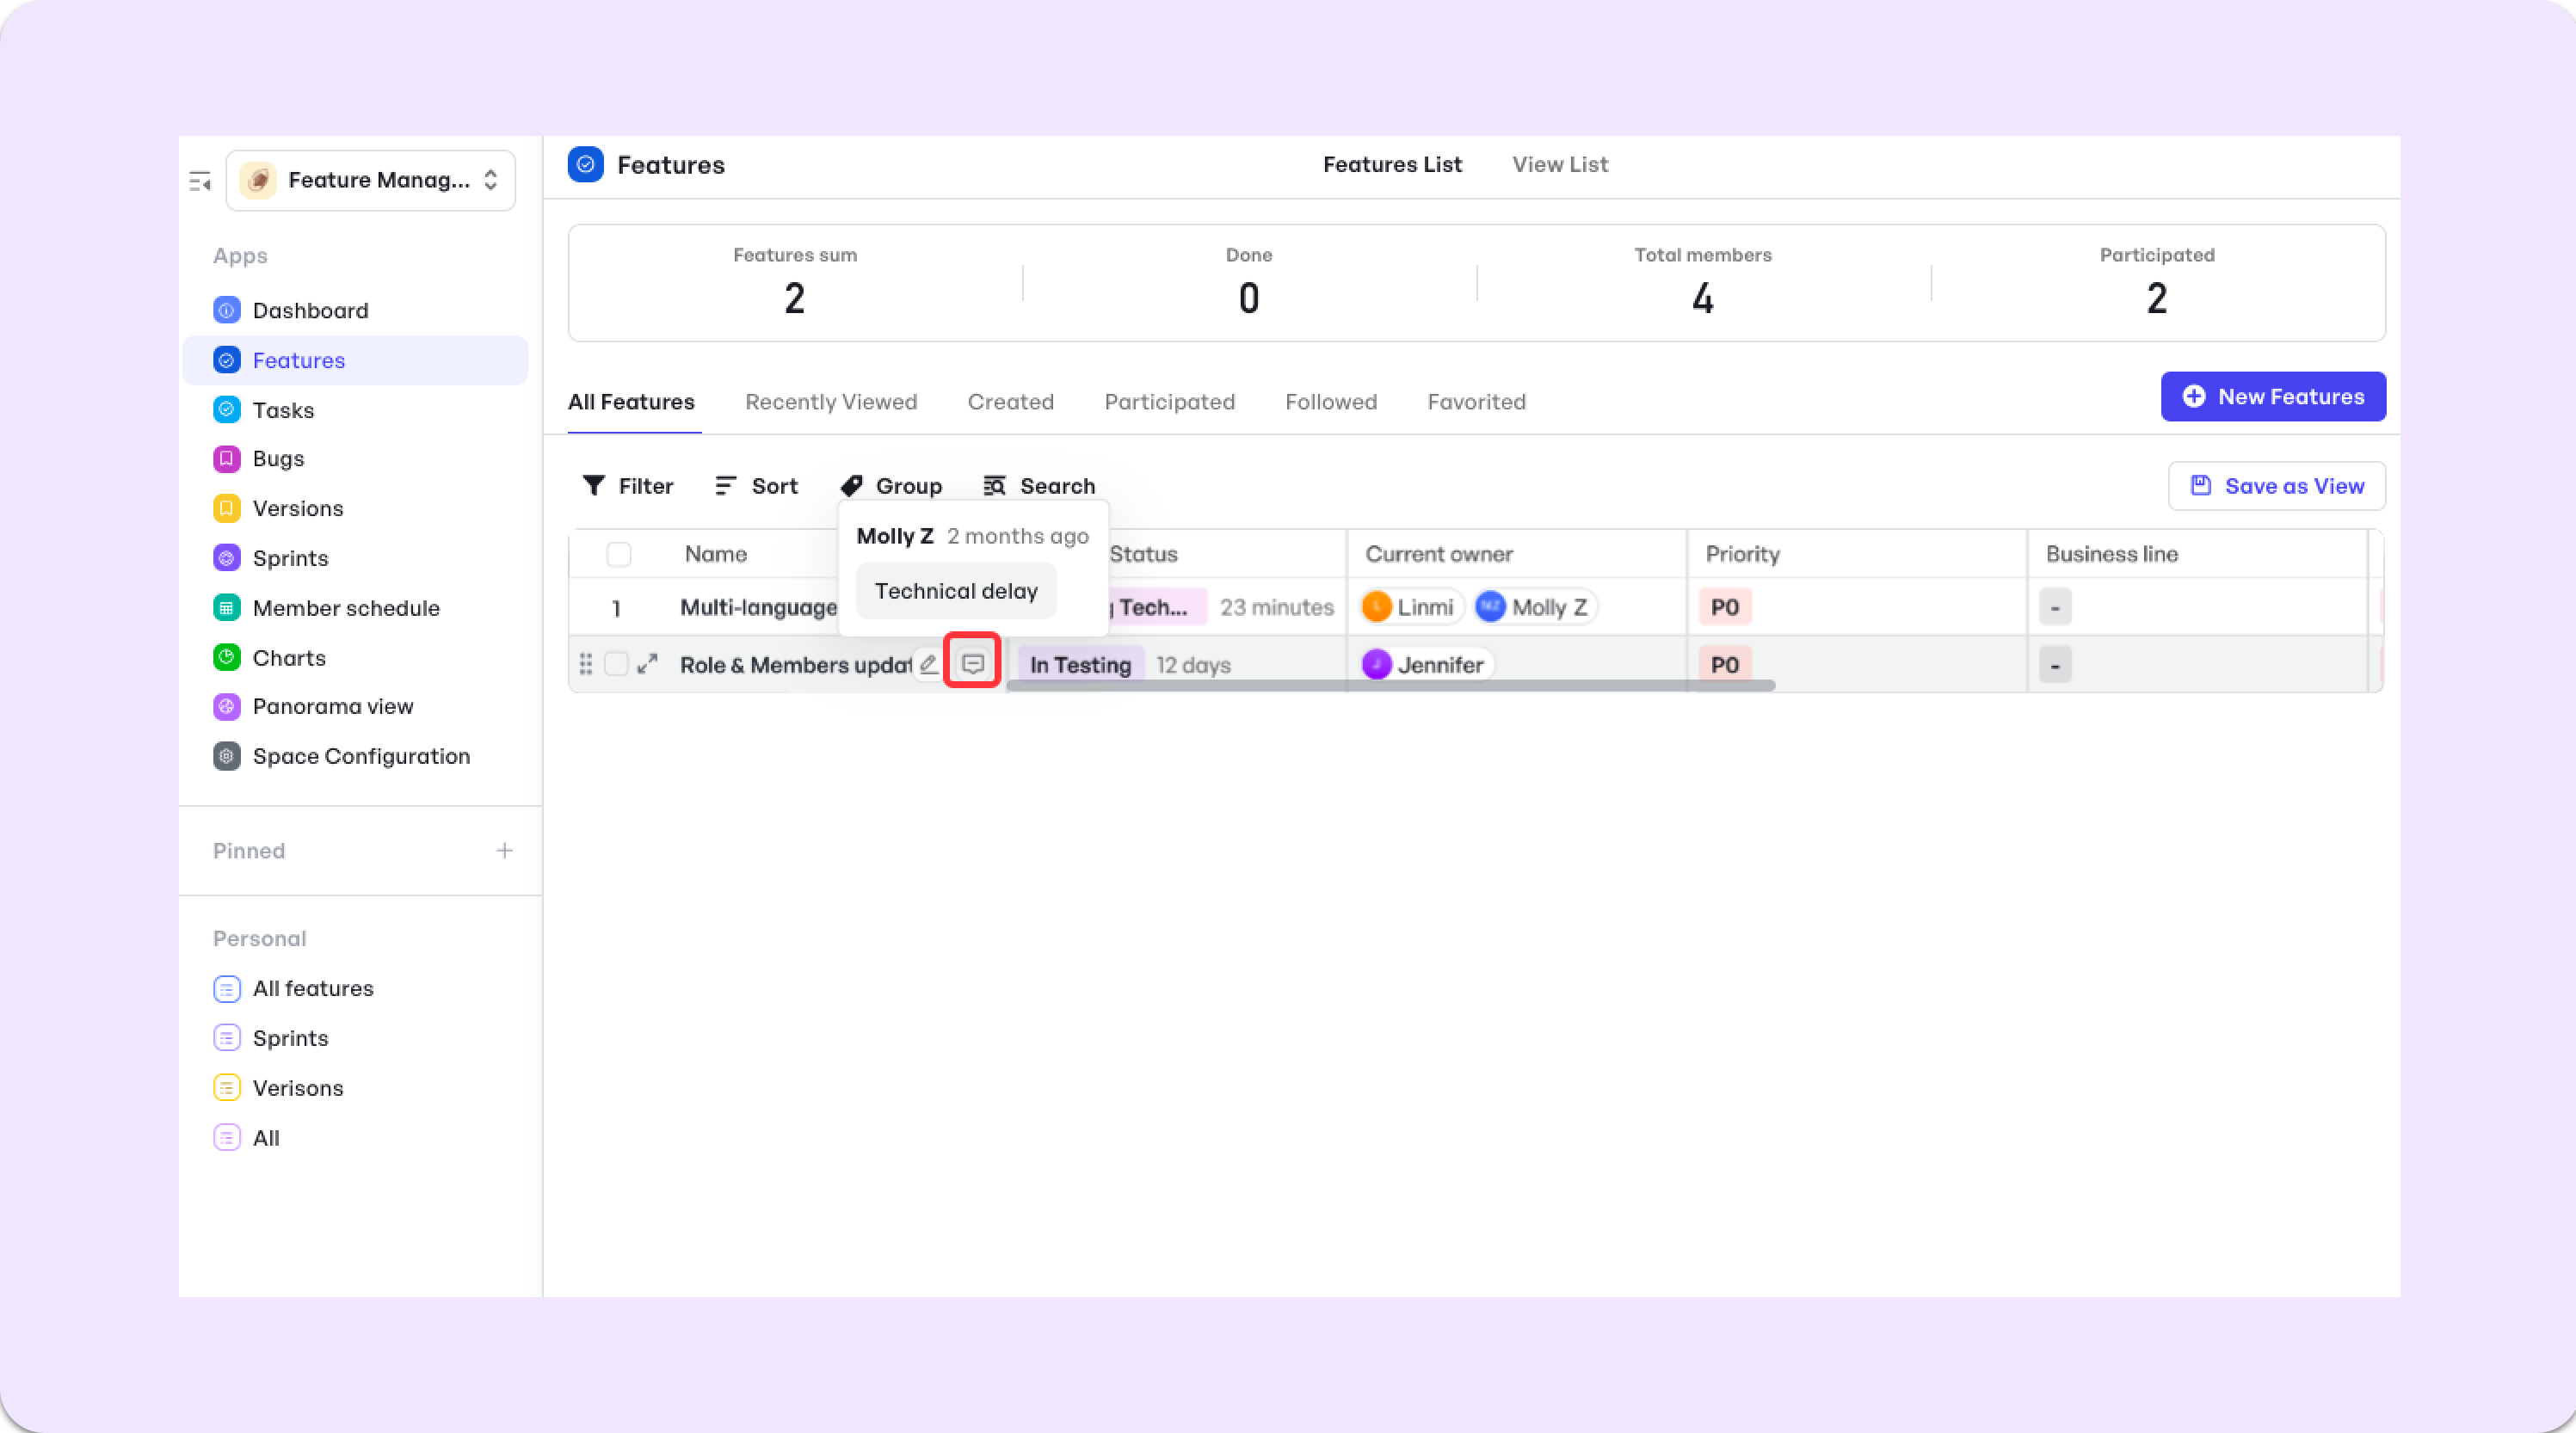 Add comments on non-functional requirements
 Because everything lives in one central dashboard, your non-functional requirements stay linked to feature nodes, progress is transparent, and no information gets lost.
Pro Tip: During planning, host a 10-minute review. Ask your engineers and QA to confirm each requirement’s feasibility and testability before you lock in your timeline.
Step 5: Set acceptance criteria
Acceptance criteria differentiates your specs into pass/fail tests. They’re the checklist that proves a feature does what it’s supposed to, and nothing more. Without clear criteria, developers and QA can end up guessing what is defined as a pass/fail. Well-defined acceptance criteria:
- Prevent feature creep by limiting scope
- Make testing straightforward and objective
- Ensure everyone, developers, designers, QA, and product, shares the same definition of “complete”
How to write acceptance criteria
For each feature, list the exact conditions that must be met. Use concrete, measurable statements. For example, a progress bar’s criteria can be:
- “The onboarding progress bar appears for 100% of new users within 3 seconds of account creation.”
- “Each segment of the bar fills correctly as the corresponding step completes.”
- “Refreshing the page retains the current progress state without errors.”
Remember to cover normal flows and edge cases (e.g., network failures or unexpected inputs).
Where acceptance criteria fit in your PRD
Create an “Acceptance Criteria” subsection under each feature spec. That way, testers can point to the PRD and tick boxes as they verify functionality.
You can turn acceptance criteria into actionable tasks inside your feature work item with Meggle:
1. Add a checklist: Open the feature work item in your space dashboard and create a checklist section for enter each criteria.
2. Link to stories or tests: Tag related user-story or QA tasks so it’s clear which criteria belong to which scenario.
3. Track status: As each condition is met, check it off. Meegle’s Gantt View shows tasks completion at a glance.
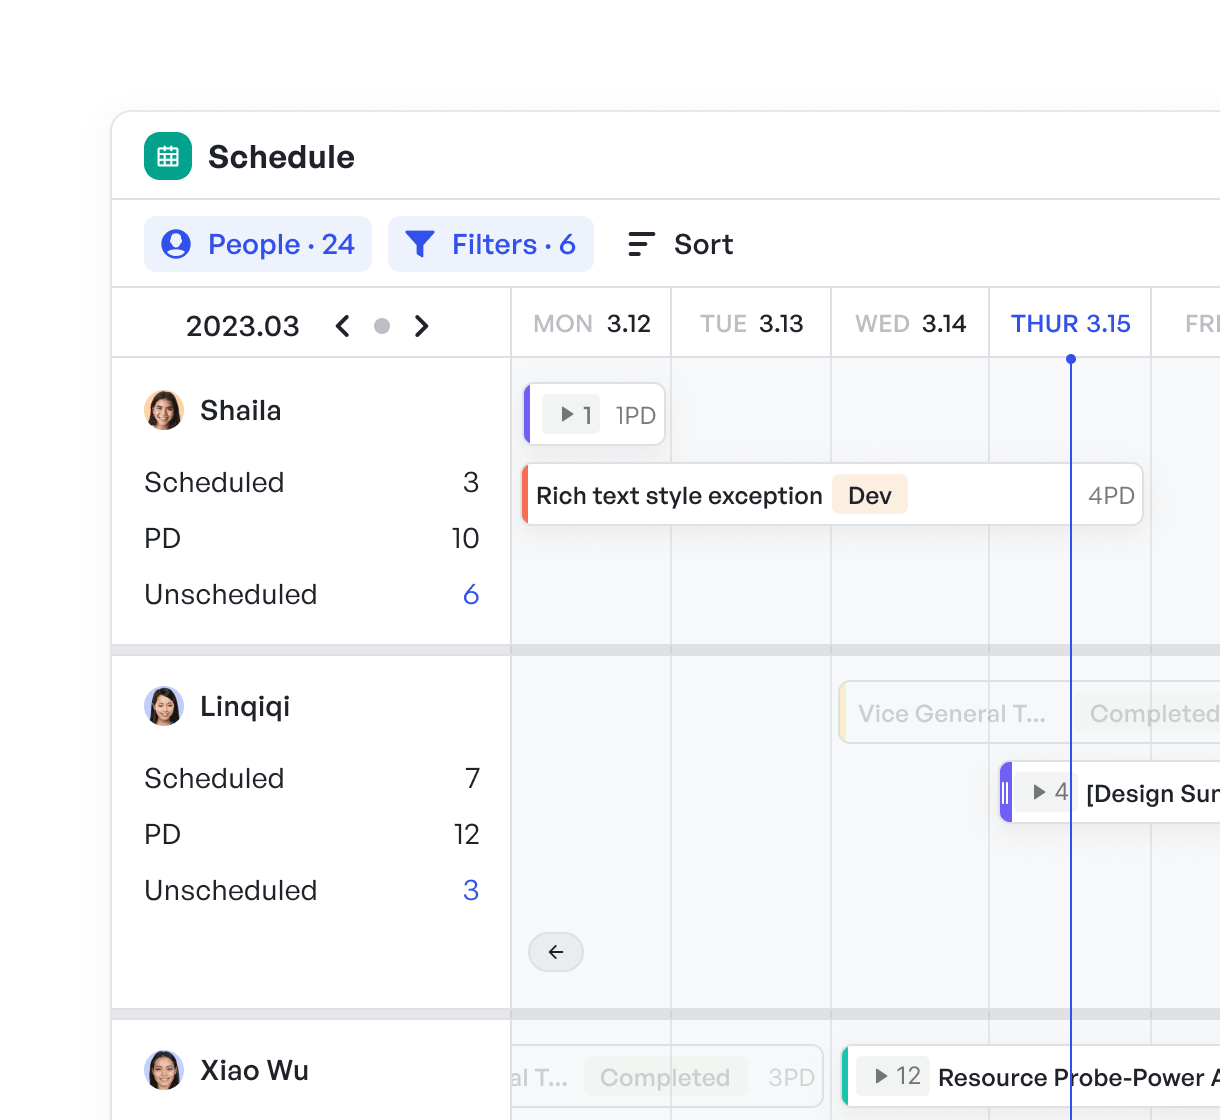 Show tasks completion at a glance
 4. Monitor in Dashboards: Use Meegle’s Tree, Table or Kanban View to tracks how many criteria are complete across all features, so you can spot bottlenecks early.
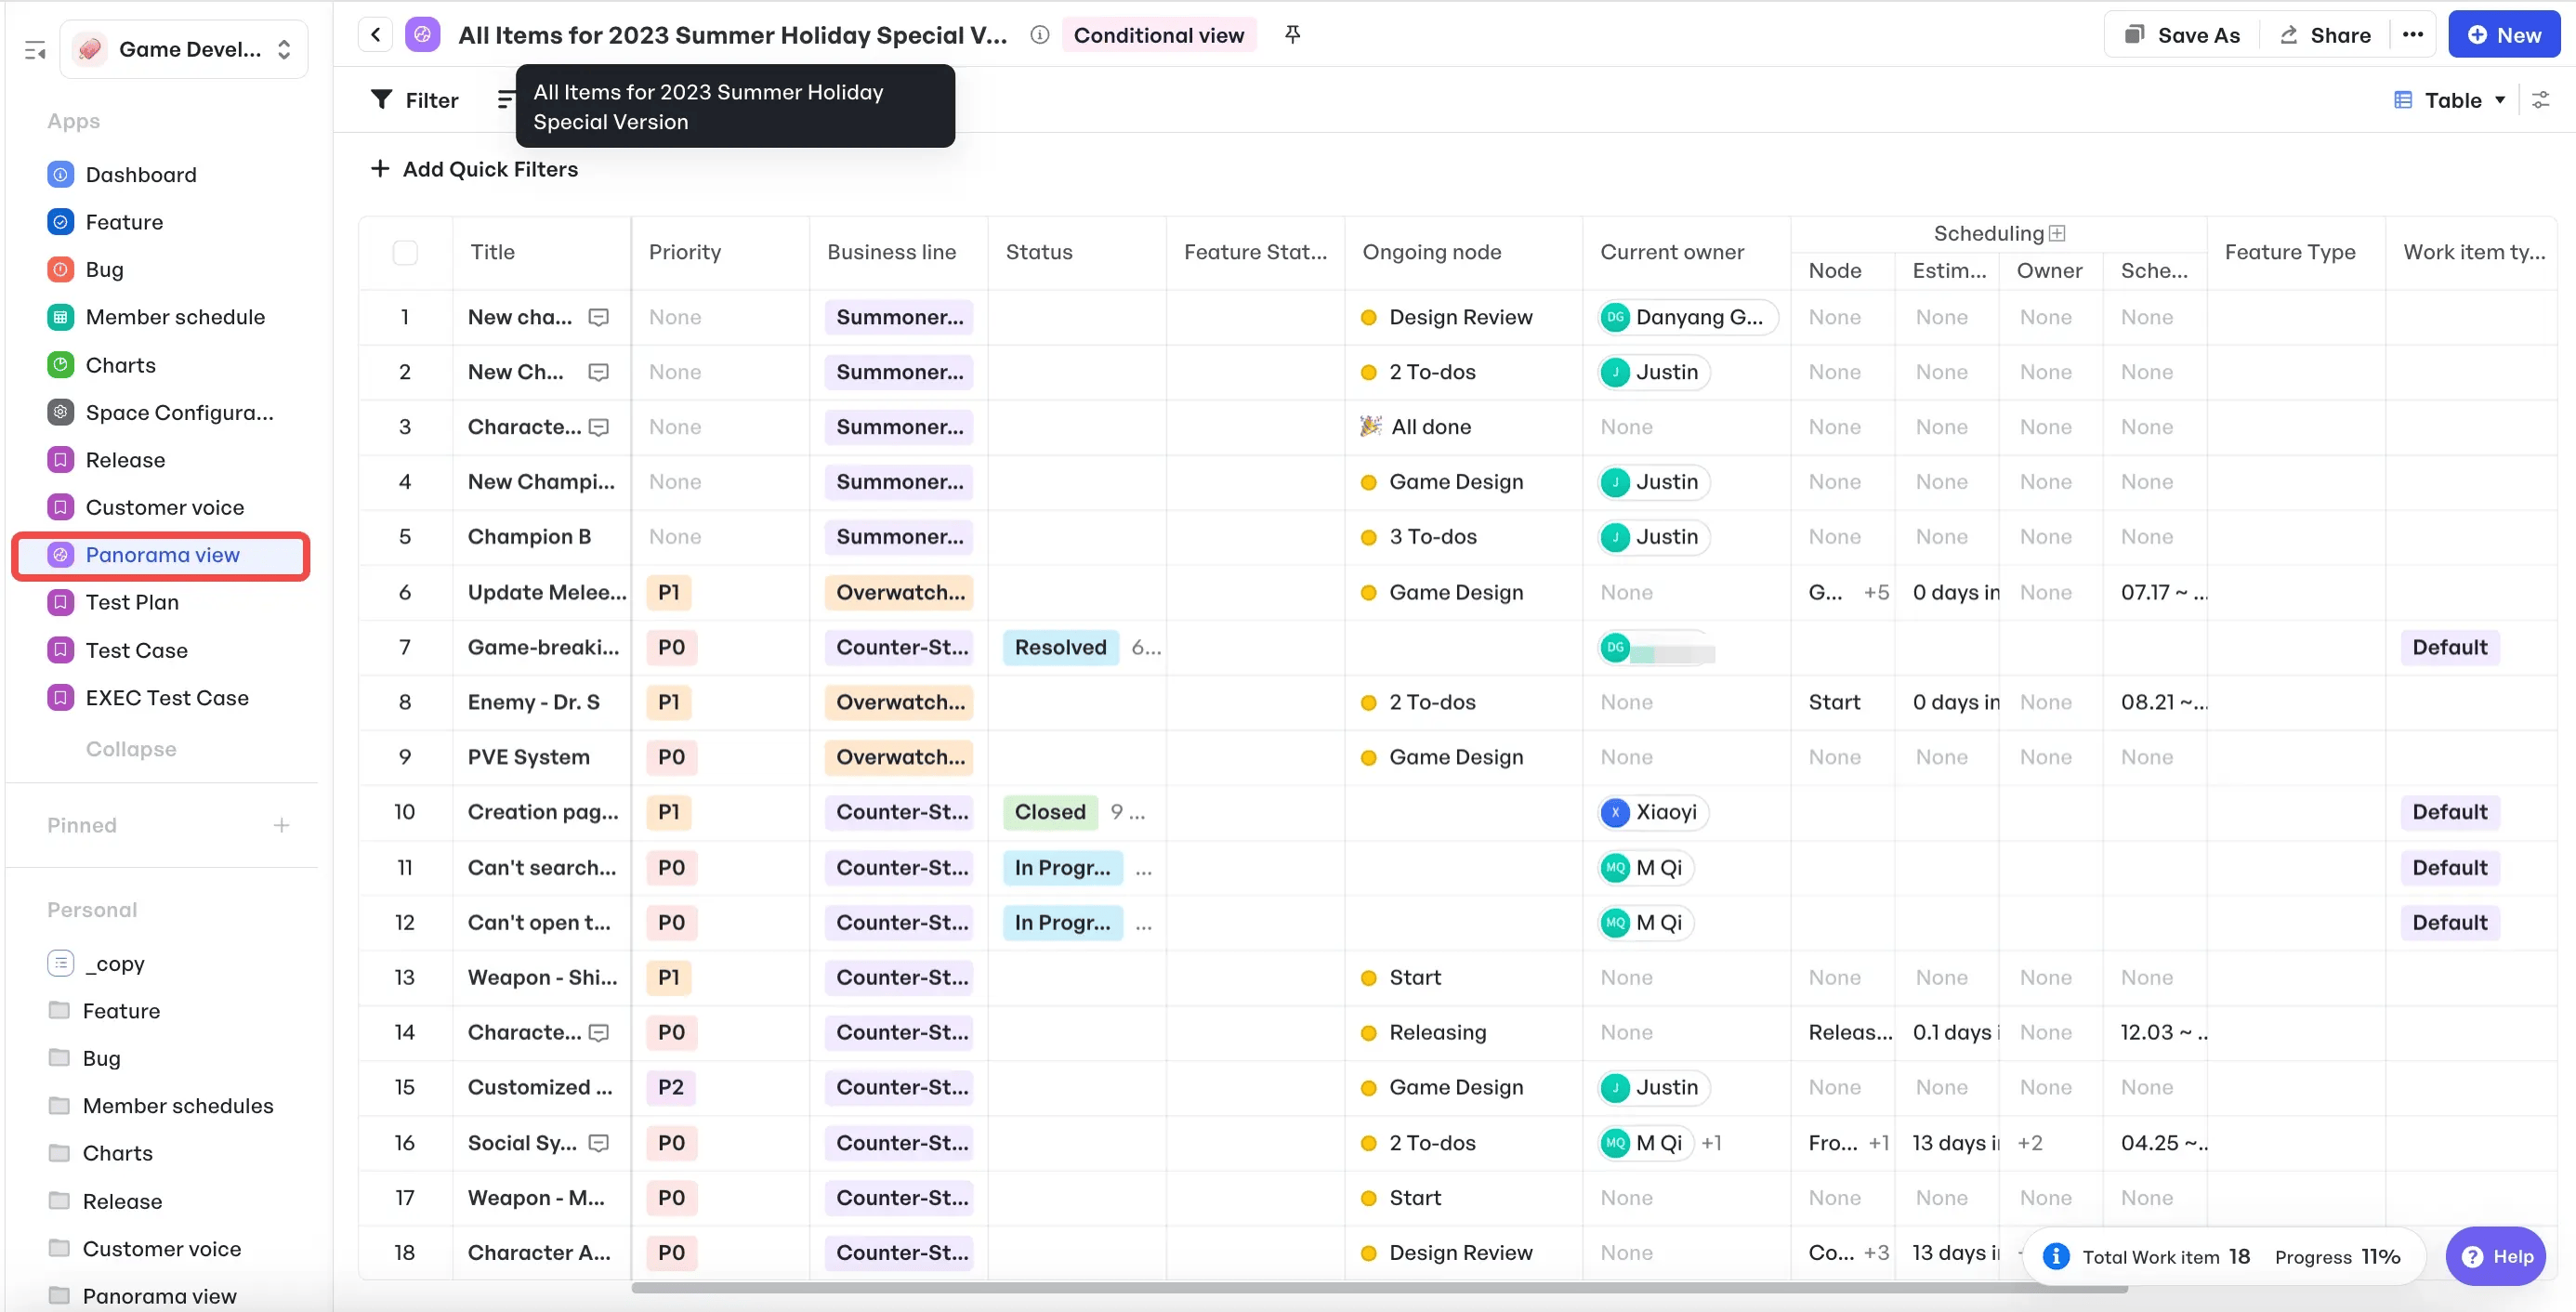 Tracking progress with Table View
 Pro Tip: During sprint planning, review acceptance criteria with your QA lead. Confirm each item is testable – if it’s vague or unmeasurable, refine it on the spot.
Step 6: Establish timeline and milestones
Always remember that a comprehensive product requirements document (PRD) doesn’t just list features. It also shows when each high-level task will happen. A clear timeline with milestones keeps your team on track and gives stakeholders confidence in your delivery plan.
Create a high-level schedule
Start by identifying 3–5 major milestones that correspond to key points in your PRD’s lifecycle. For example:
- Week 2: Complete UI designs
- Week 4: Finish core feature development
- Week 6: Begin internal beta testing
- Week 8: Launch public beta
These checkpoints give everyone a shared sense of progress and help you spot delays before they become roadblocks.
Assign deadlines and owners
Next to each milestone, assign team members responsible for each task and what be clear on the outcome. In your PRD, a simple table can work well:
| Certification | Format and Duration | Hands-on Experience | Networking and Community | Best For | Cost |
|---|---|---|---|---|---|
| Product School – PMC | Small classes (avg. 20 students); cohort-based | Real-world projects with feedback from instructors at top tech companies | 100K+ Slack community, AMAs, hiring manager access | Career switchers and early PMs seeking mentorship and industry credibility | $2,999 (Single); $4,999/year (Unlimited) |
| Pragmatic Institute | Framework-focused; modular | Templates, exercises, simulations; market-driven | 36K+ alumni, podcasts, ebooks, forums | Experienced PMs wanting strategy-first tools to scale products | $3,685 |
| BrainStation – PMC™ | Live online; project-based | Breakout rooms, real-time feedback, portfolio-ready projects | 30K+ alumni, Slack, career events | Visual learners who thrive in hands-on, collaborative environments | $3,250 |
| AIPMM – CPM | 3-day intensive + exam | Academic, comprehensive product lifecycle coverage | Formal recognition, especially in enterprise | PMs in traditional industries seeking credentials with global recognition | $125/year (membership); $395–$520 exam |
| IBM Product Manager Certificate | Self-paced online (Coursera) | Digital product dev, Agile, data-driven methods | Limited; platform-based discussion | Aspiring PMs needing flexible, affordable training | $39/month |
| Product Coalition (Bonus) | Free, self-directed platform | Practical articles, discussions, publishing, peer feedback | 7K+ Slack members, global collaboration | PMs seeking ongoing community-led learning without formal certification | Free |
To make this step easier, we'd recommend using Meegle’s Gantt timeline. You can visual your milestone nodes directly on a calendar, set deadlines and re-assign owners with custom fields.
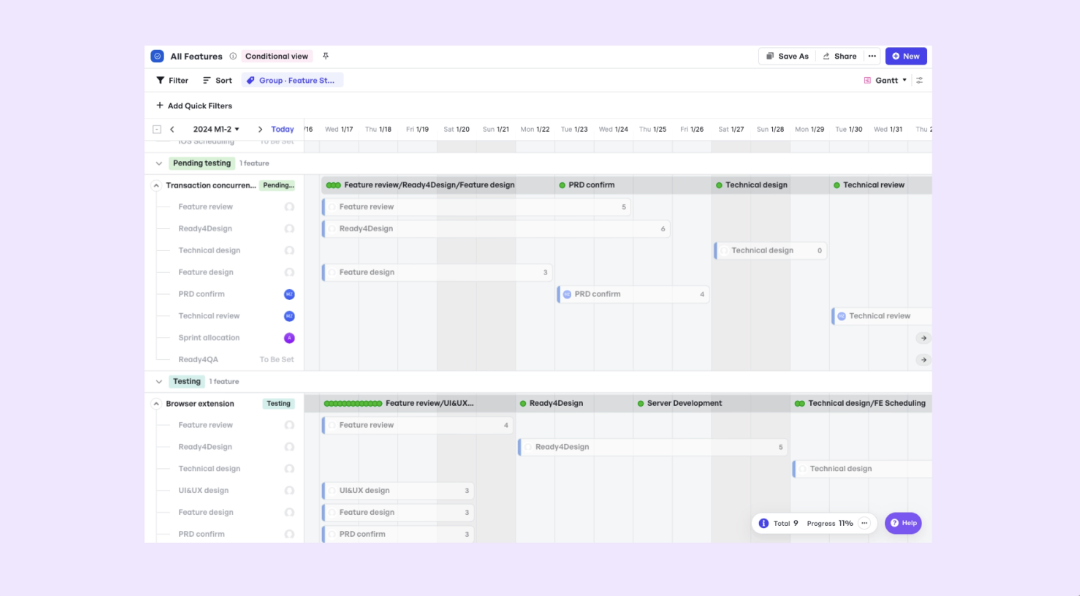 Visualize timeline with Gantt
Also, any delay tasks can be automatically flag with delay label, so you can spot and address roadblocks before they escalate.
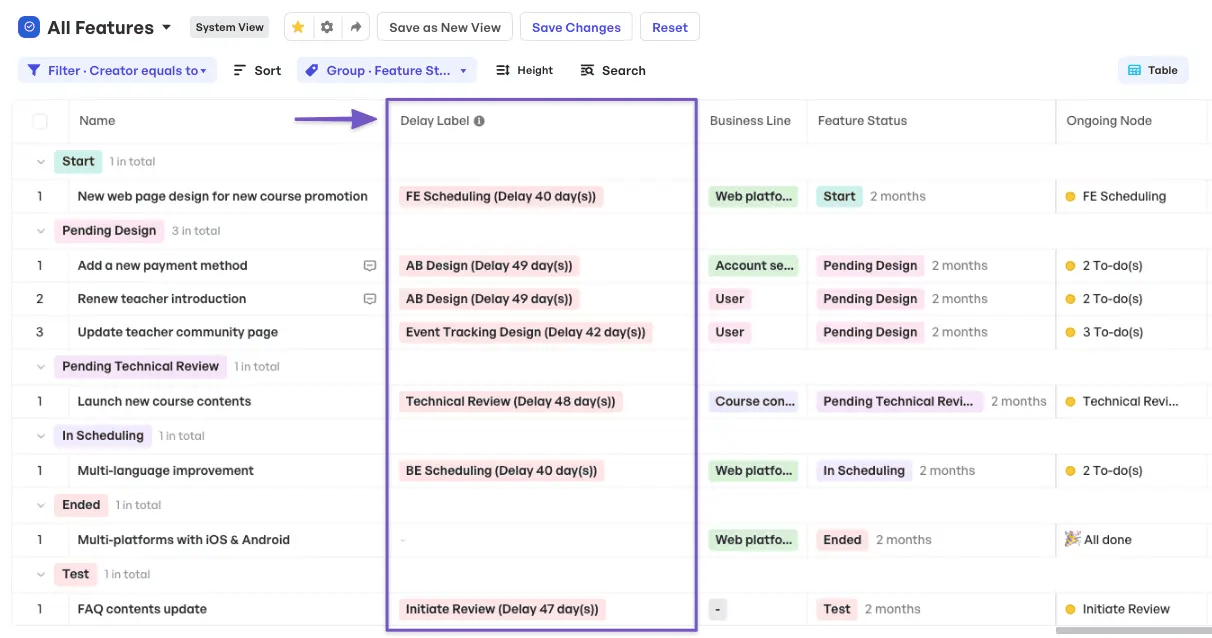 Automatically flag delay with delay label
 Use Meegle’s List View alongside your timeline to monitor progress.
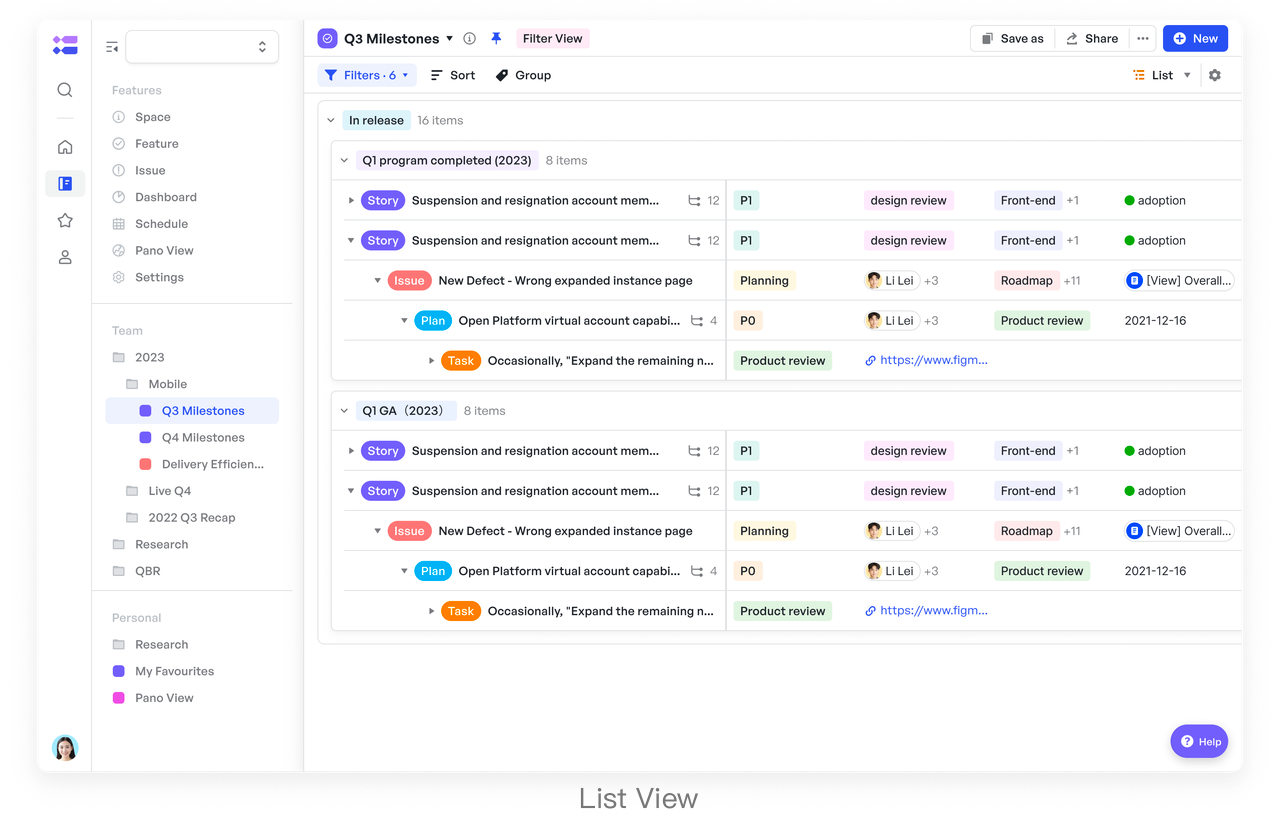 List View
 Each milestone node shows its completion status, giving you both a bird’s-eye overview and the granular detail needed to keep your PRD schedule on track.
Pro Tip: At the start of each week, glance at your Meegle timeline together for 5 minutes. A quick check-in helps teams celebrate small wins and adjust any upcoming milestones in real time.
Step 7: Identify dependencies and assumptions
Before your team starts building, take a moment to list what the project relies on and what you’re assuming to be true. These directly affect your timeline, scope, and ability to deliver. Missed dependencies can stall development and broken assumptions can lead to painful rework. Calling them out early helps you plan realistically and avoid surprises later.
Start by listing each dependency and assumption in two simple columns. For example:
| Dependency | Assumption |
|---|---|
| Email API ready by Week 6 | Users have a modern browser |
| Analytics data feed available | Mobile network speeds ≥ 3G |
| Design mockups approved by Week 3 | Existing authentication flow stays the same |
Putting these side by side makes it easy to see what could block progress and what you’ll need to revisit if priorities shifts.
Next, give each item a brief note so team members can understand the importance. For instance:
- “We depend on the email API by Week 6 so users can send referral invites as part of onboarding. If the API isn’t ready, this feature will be delayed and may need to be excluded from the initial release.”
- “Assuming users have modern browsers lets us skip polyfills, but we’ll need to revise if that changes.”
After this step, upload all dependencies and assumptions as dedicated work items in Meegle. Use custom tags such as “Dependency” or “Assumption” so you can filter them instantly.
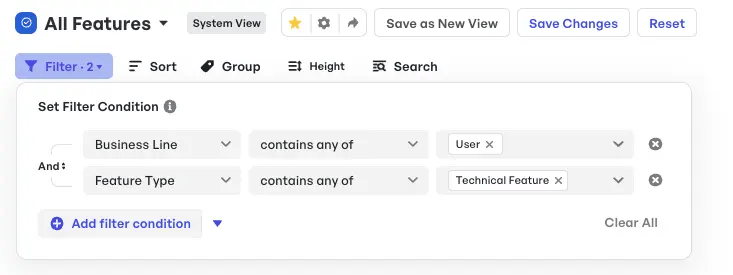 Set filter conditions
 Invite the relevant team members into the discussion via @mentions to confirm timelines or challenge assumptions. As your project moves forward, Meegle’s version control logs every change to these items, giving you a clear audit trail of when an assumption was updated or a dependency date shifted.
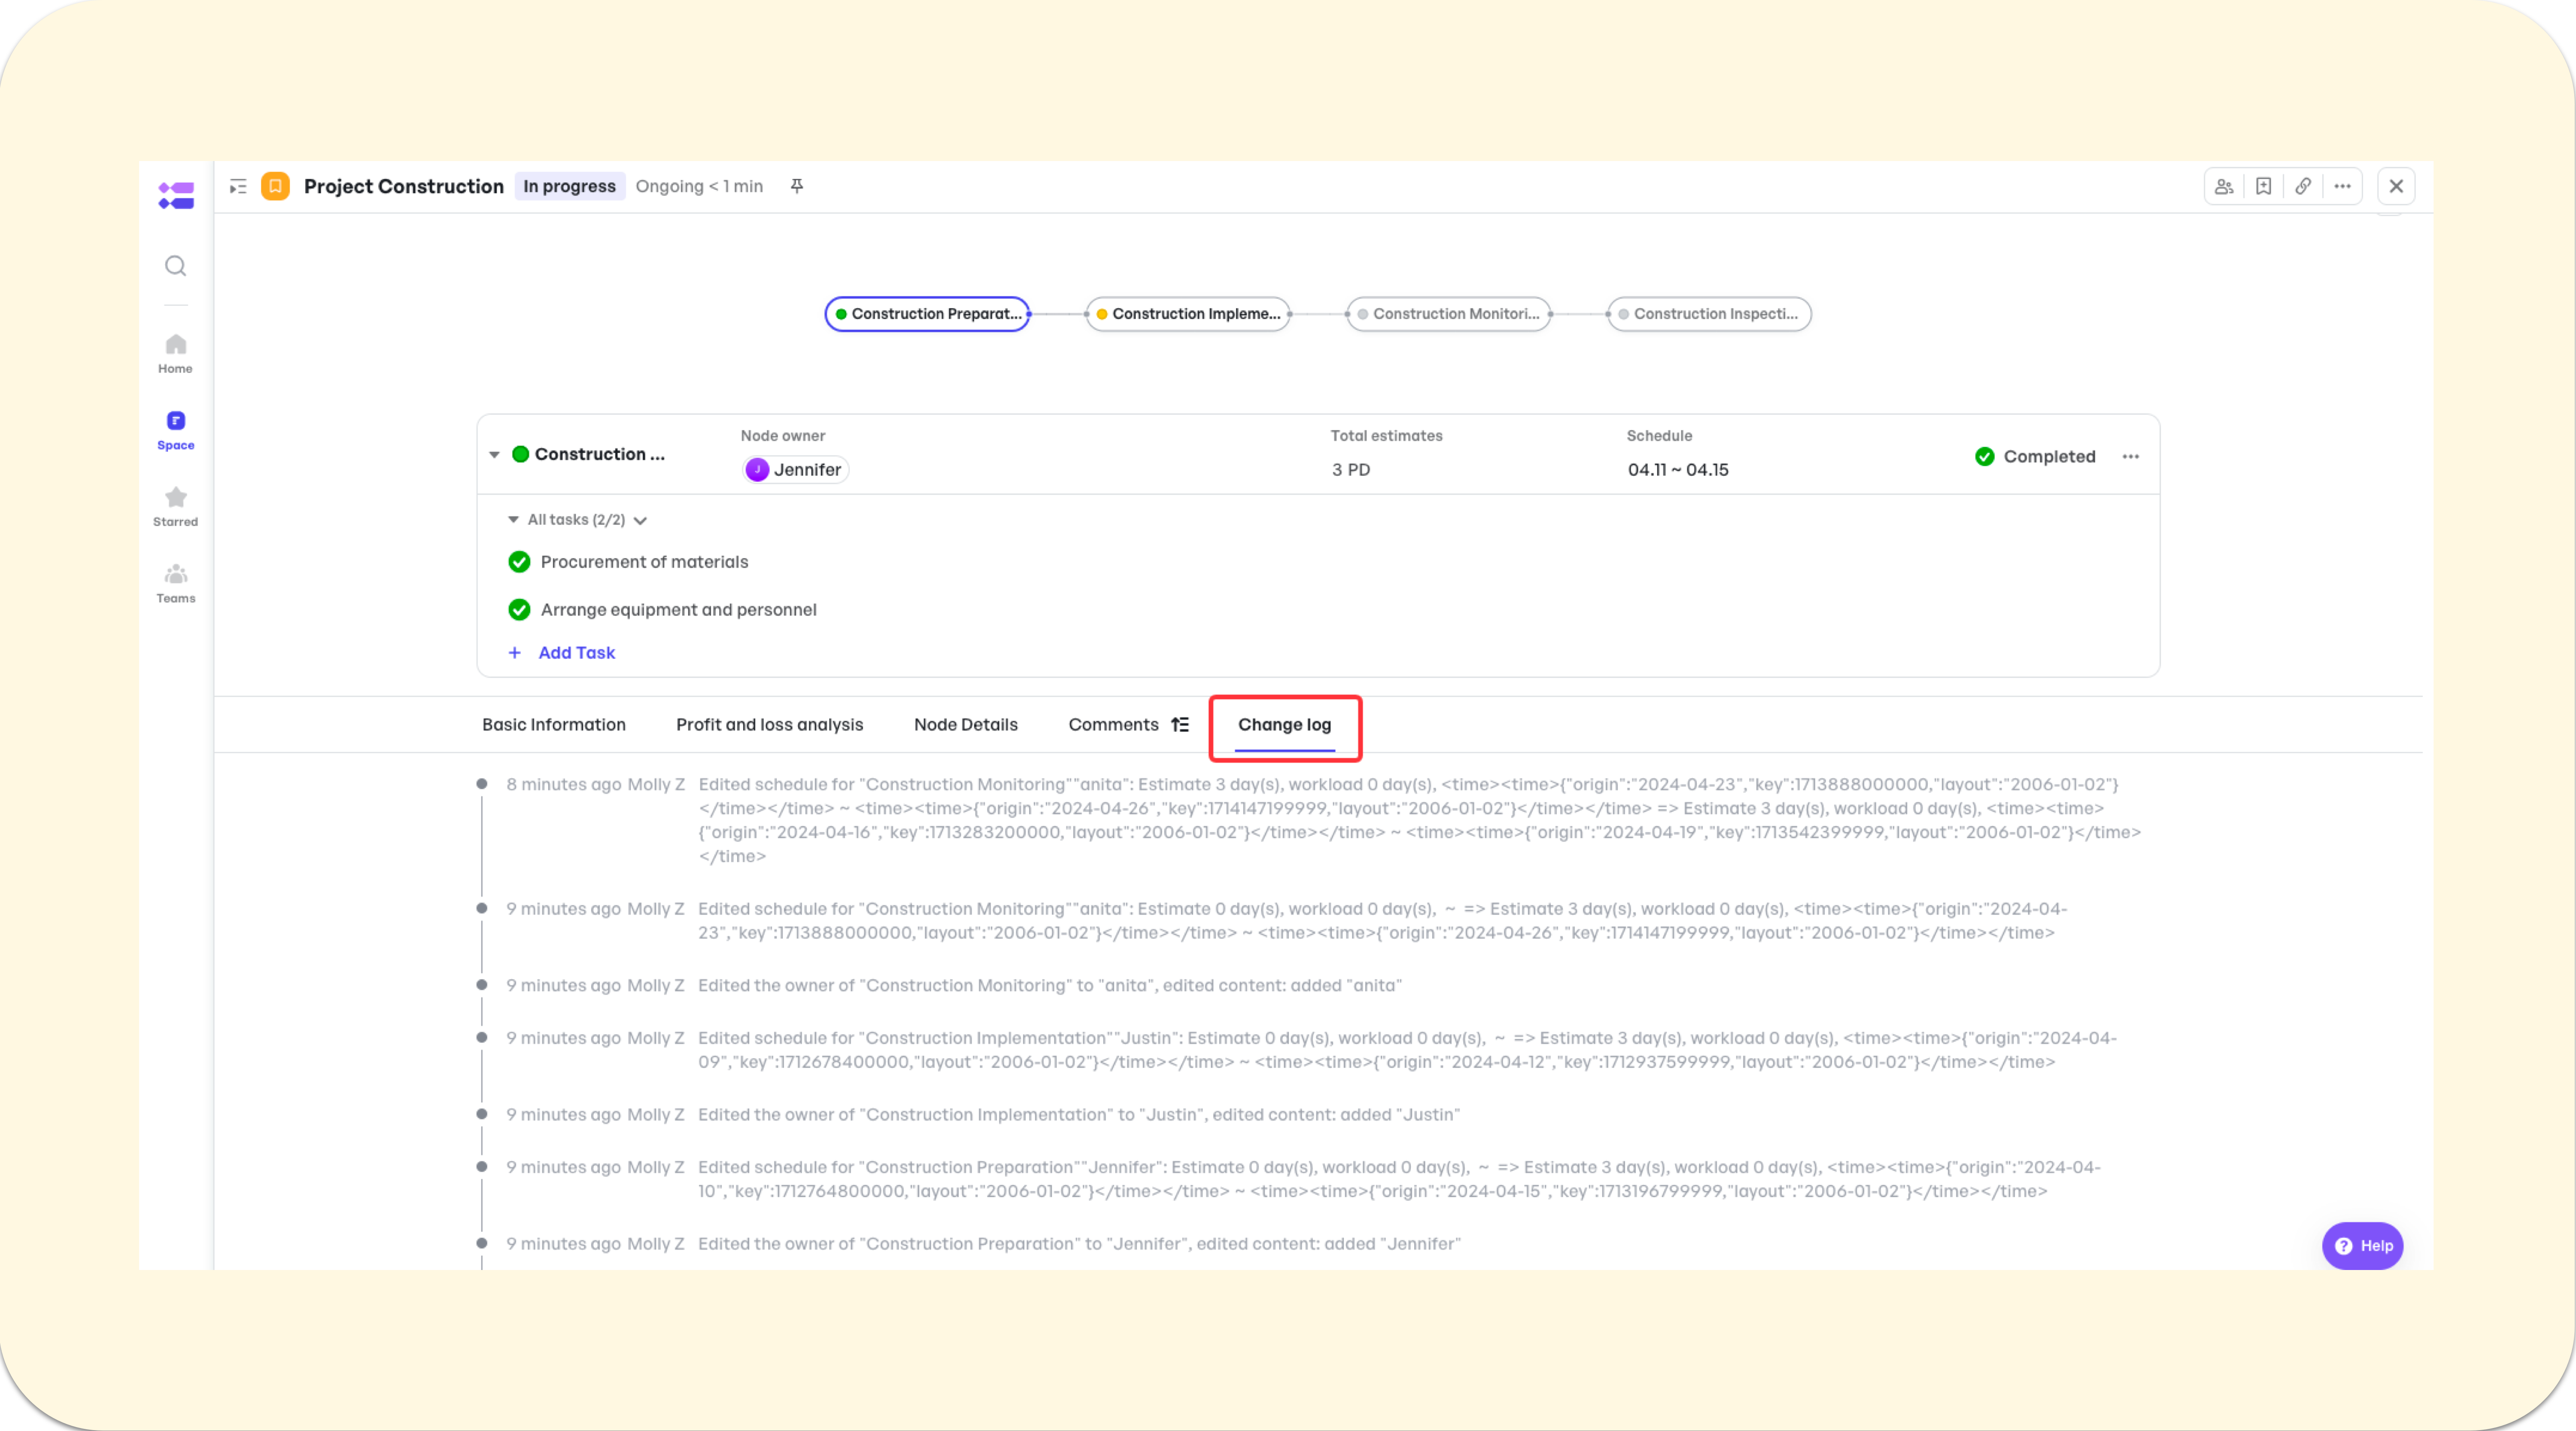 Meegle's change log
 This way, your PRD stays up to date as timelines shift or priorities change, while keeping a clear record of what changed, and when.
Pro Tip: Review your dependencies and assumptions with engineering, design, and data leads before finalizing your PRD. A 15-minute cross-functional check-in can uncover risks you hadn’t considered and help you plan around them early.
Step 8: Define target users and personas
A key section of your PRD is laying out exactly who you’re building for. Vague labels like “end users” or “admins” can never guide design or development that detailed personas do.
Identify core user segments
Start by listing the main segment of people who will use your product. For a dev collaboration app, for instance, you might have:
- a 30-year-old engineering manager who needs quick visibility into team progress
- a 24-year-old junior developer looking for an easy onboarding experience
Keep each persona to a short paragraph that covers:
- Role & demographics (job title, age range)
- Primary goals (what they’re trying to achieve)
- Key frustrations (what slows them down today)
This level of detail helps your team make concrete decisions: which UI patterns to use, what data to surface first, and which workflows to prioritize.
Frame personas in your PRD
Under the Target Users section, dedicate one subsection per persona. Include a brief story, e.g.,
“(User) needs a single dashboard to spot blocked tasks across five engineers so he can unblock issues before sprint end."
This grounds every feature in a real user scenario. For this step, Create a "Persona Profile" work item in Meegle’s centralized dashboard, then add custom fields for “Goals,” “Frustrations,” and “Preferred Workflow.”
Drop in any interview notes, survey results, or screenshots of user research as attachments. Invite marketing and UX colleagues to comment and refine the profiles in real time.
 Team members add comment on a dependency
 As you iterate on the features, Meegle’s version history keeps track of changes, so you always know which insights shaped your PRD.
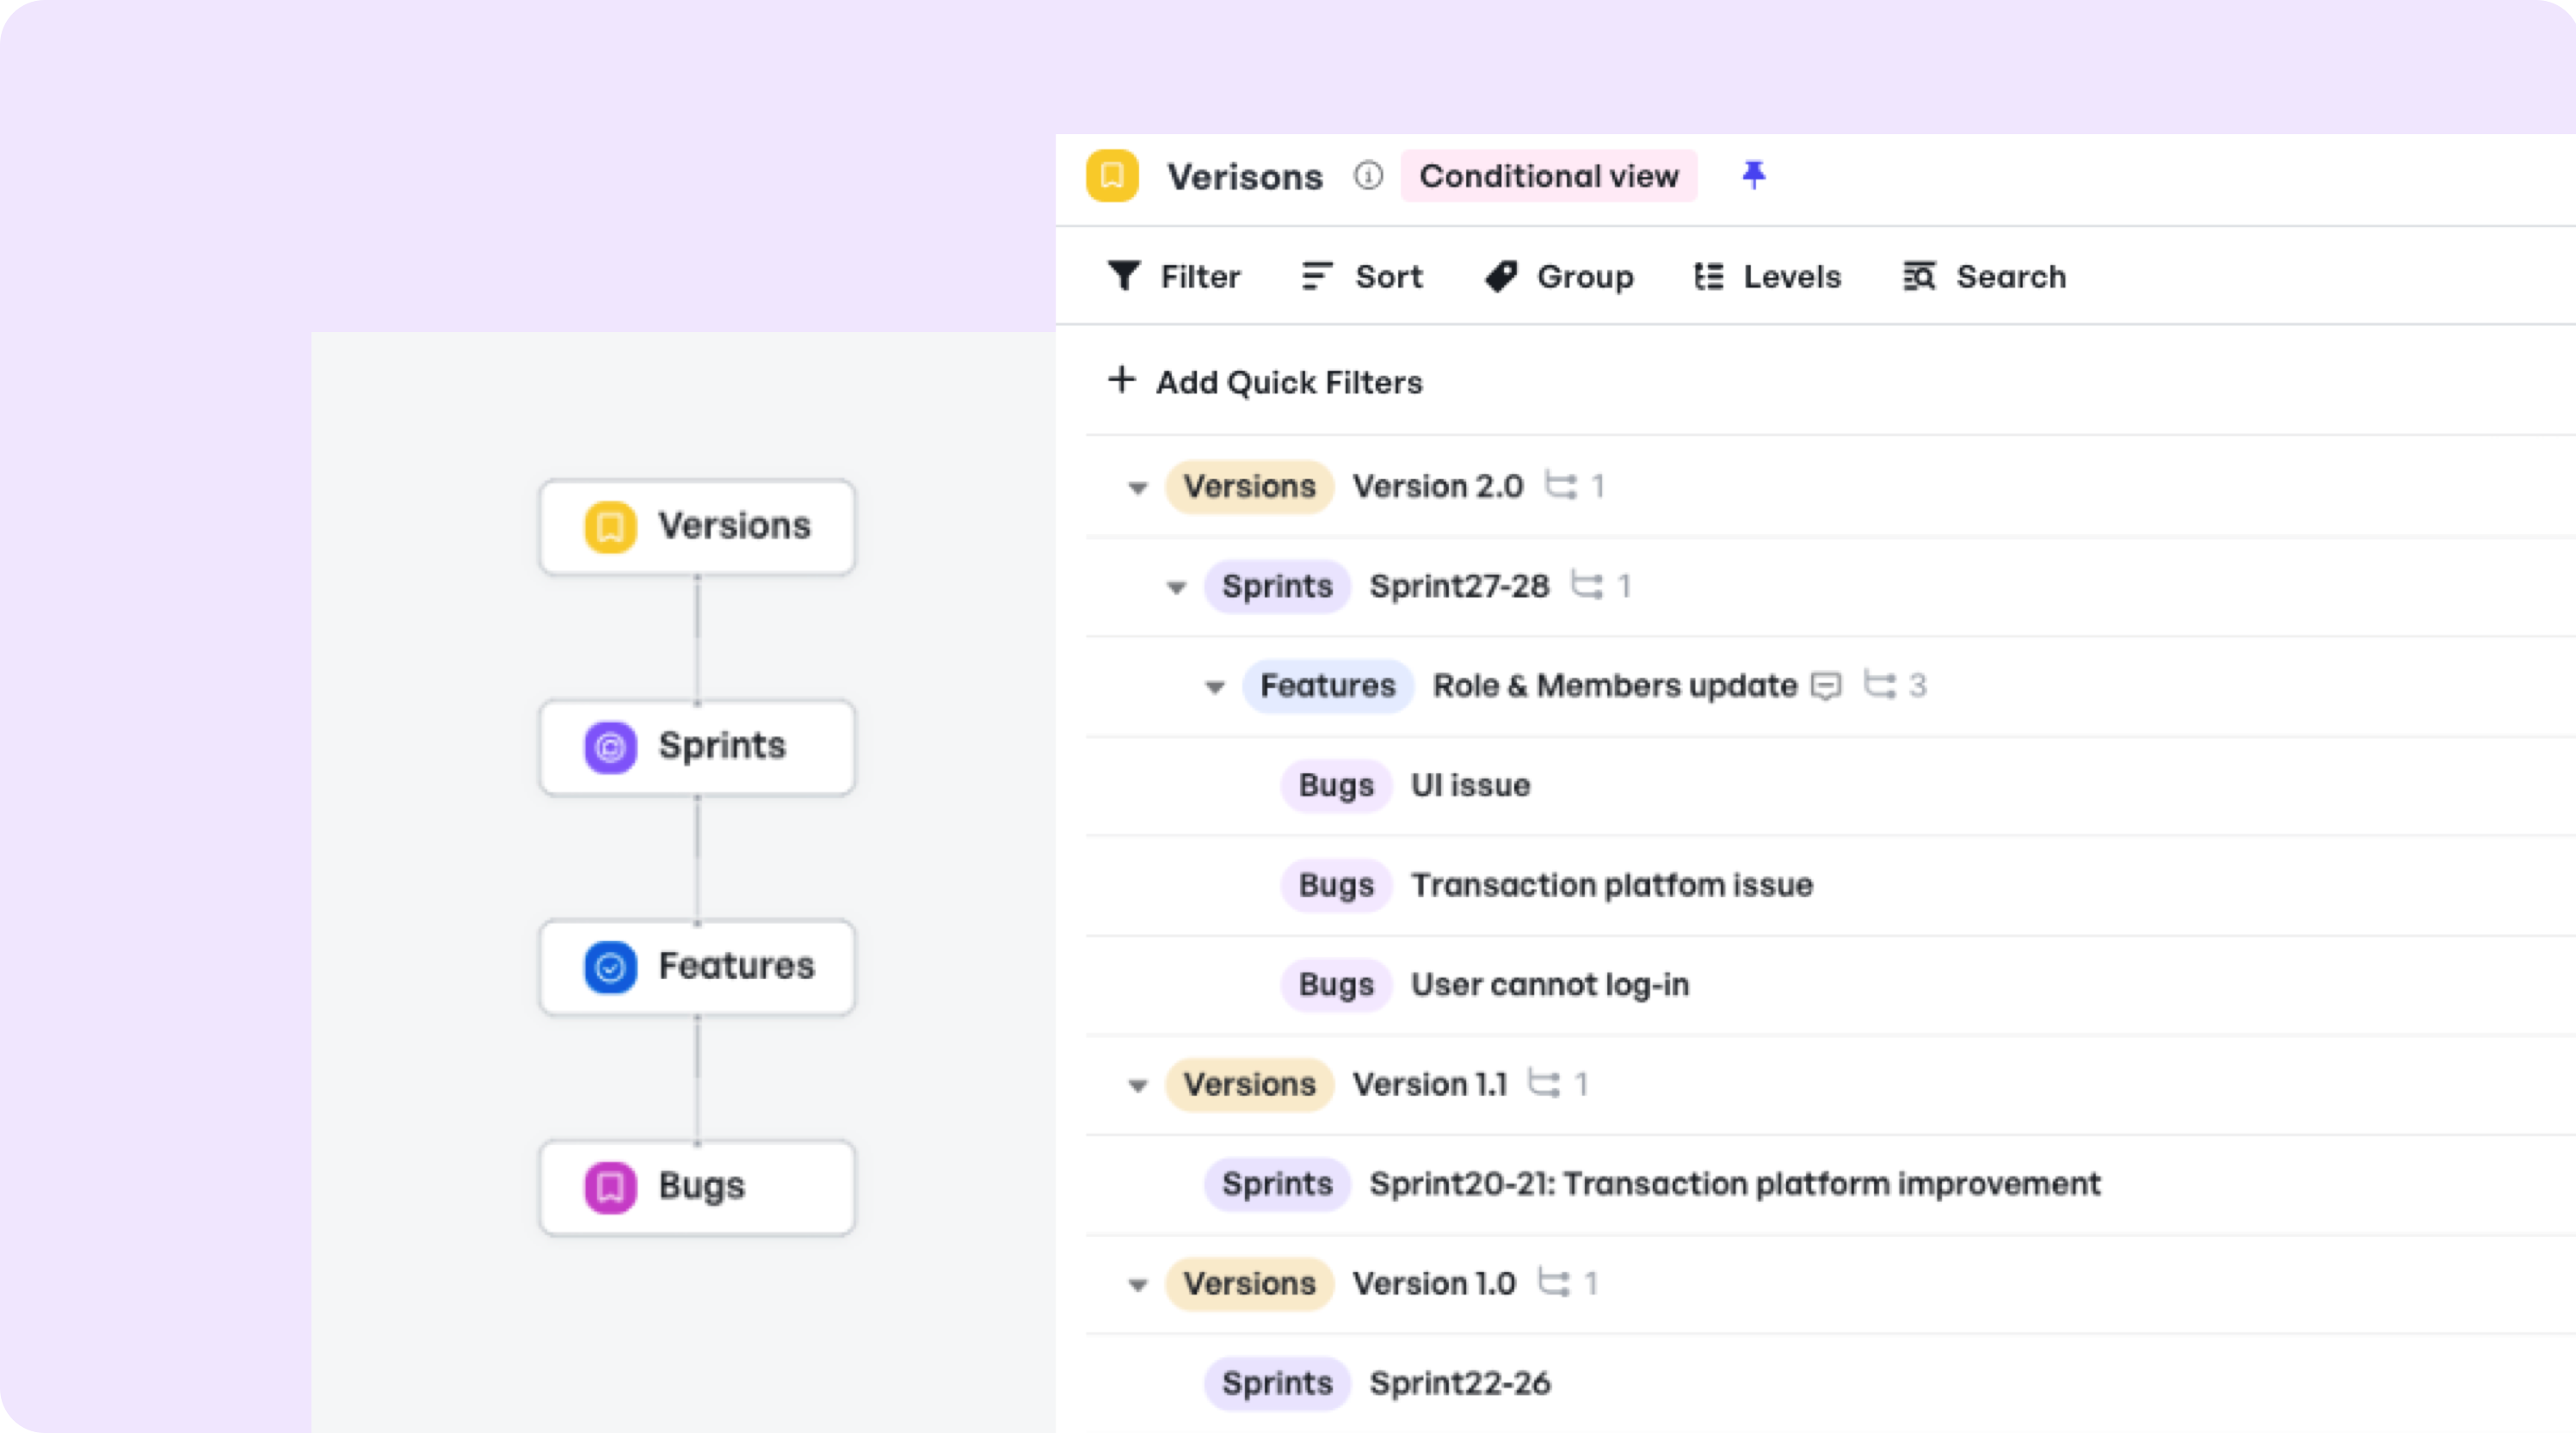 Track version changes with version history
This is the final step in creating, managing, and executing a complete product requirements document (PRD).
With clear goals, well-defined user stories, detailed specs, and structured collaboration in Meegle, your team can move from idea to execution with alignment, clarity, and confidence.
Pro Tip: Schedule a 15-minute persona-review session. Ask your designer or researcher to validate each profile ensures your PRD reflects actual user needs, not assumptions.
TL;DR
- A Product Requirements Document (PRD) is more than a checklist—it’s a central hub that aligns teams around goals, user needs, feature specs, and constraints to drive focused development.
- It typically includes product goals, user stories, feature specs, non-functional requirements, timelines, dependencies, and target personas.
With Meegle, creating and managing a PRD becomes structured and collaborative:
- Define clear goals and break them into actionable tasks using Meegle’s visual workflows.
- Capture user stories and use cases with context, feedback loops, and built-in validation tools.
- Turn specs into trackable work items, including edge cases and performance requirements.
- Manage timelines, dependencies, and personas in one place with live dashboards and version control—keeping your PRD always up to date.
Now that we've established what goes into an effective PRD, you might be wondering how it fits into the broader ecosystem of product documentation.
Let's clarify some differences.
PRD vs. other documents (BRD, FRD, MFD)
Product teams often work with several documents: PRDs, BRDs, FRDs, and MFDs. And while they’re all important, each serves a different purpose. Knowing what belongs in each one helps avoid confusion that leads to scope creep.
Here’s a clear breakdown to help sort it out.
| Document | Focus | Owned by | Key Questions | Example | How it Relates to PRD |
|---|---|---|---|---|---|
| PRD (Product Requirements Document) | Features and functionality from a user and product point of view | Product Manager | What are we building? Who is it for? What should it do? What are the priorities? | Add a referral tracker that lets users share a link and tracks signups | This is the PRD. It translates business needs into actionable product work |
| BRD (Business Requirements Document) | Business goals and strategic needs | Business Analyst or Product Owner | Why are we building this? What business case are we solving? What’s the expected impact? | Boost referral-driven signups by 20% over the next quarter | PRD uses the BRD to define what to build to meet business goals |
| FRD (Functional Requirements Document) | Technical and system behavior | Engineer or Technical Lead | How will this work? What are the system behaviors? How do components interact? | Referral tracker logs clicks in backend DB via API | PRD explains what a feature should do; FRD explains how to build it |
| MFD (Market/Marketing Requirements Document) | Market needs and competitor research | Product Marketing or Strategy Lead | What does the market need? What customer pain points or trend exist? How are competitors solving it? | Users expect Slack integration in modern project tools | PRD uses MFD insights to prioritize features users want |
Of all these documents, the PRD is like the product team’s home base. It enables informed decisions by connecting strategy to execution. It takes business requirements (from the BRD), market signals (from the MFD), and technical constraints (from the FRD), and turns them into a clear, buildable product plan. Now that we’ve looked at how a PRD pulls from documents, you might be wondering: who takes ownership of writing it?
Who writes a PRD?
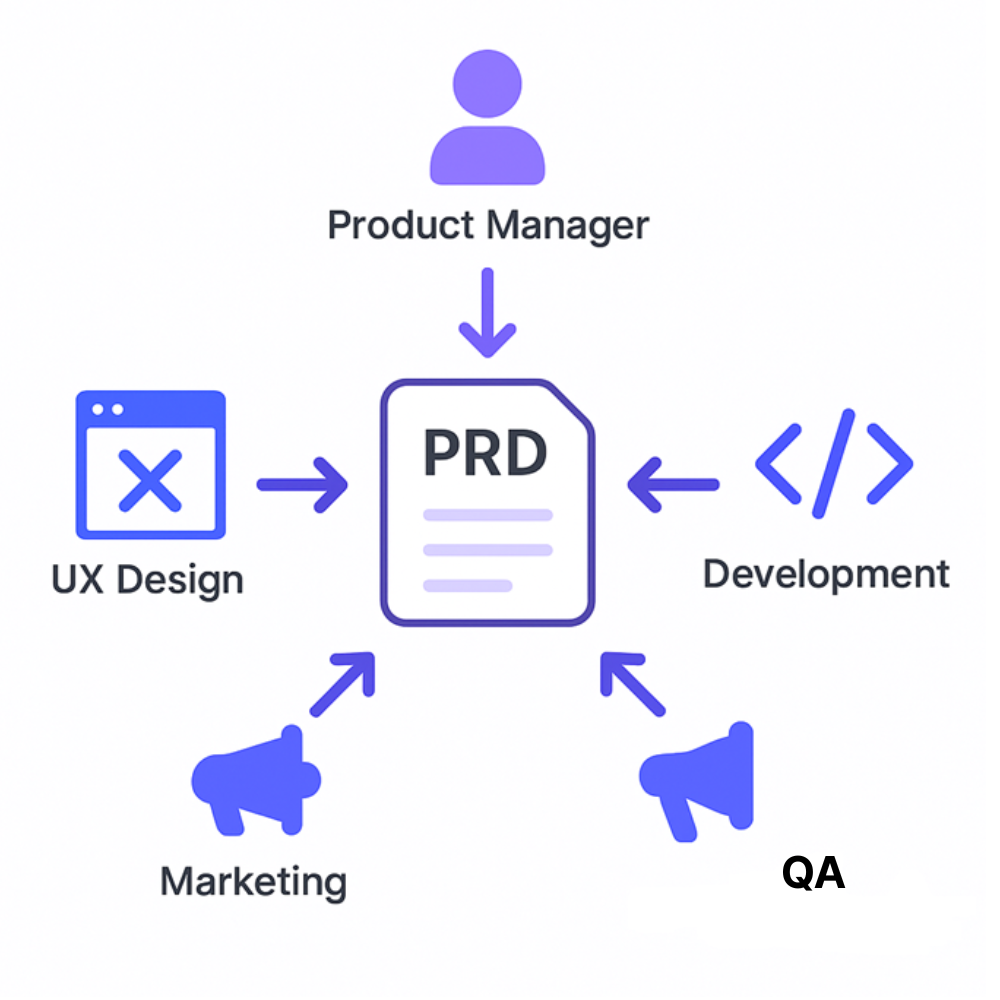 People who are involved in writing PRD
Product managers usually writes the PRD. That’s because they sit at the center of the project. They understand the user needs, business goals, and technical limits. They're also in the best position to give the team high level directions.
But a great PRD isn’t an individual effort. It’s shaped by everyone involved. UX designers help make sure the product feels easy and intuitive to use. Development teams flag any technical risks or low-probability but high-impact issues.
Marketing checks that the product fits the overall messaging. QA teams highlight what will need testing. And stakeholders make sure it aligns with ROI goals. Getting input from business and technical teams early helps avoid surprises later!
Try Meegle's Product Quality Assurance Template for free!
If each team contributes upfront, there’s less confusion down the road and everyone’s clear on what’s being built, who it's for and how success will be measured.
Best practices for writing an effective PRD
To help you create a product requirement document that improves clarity and action, here are four best practices to follow.
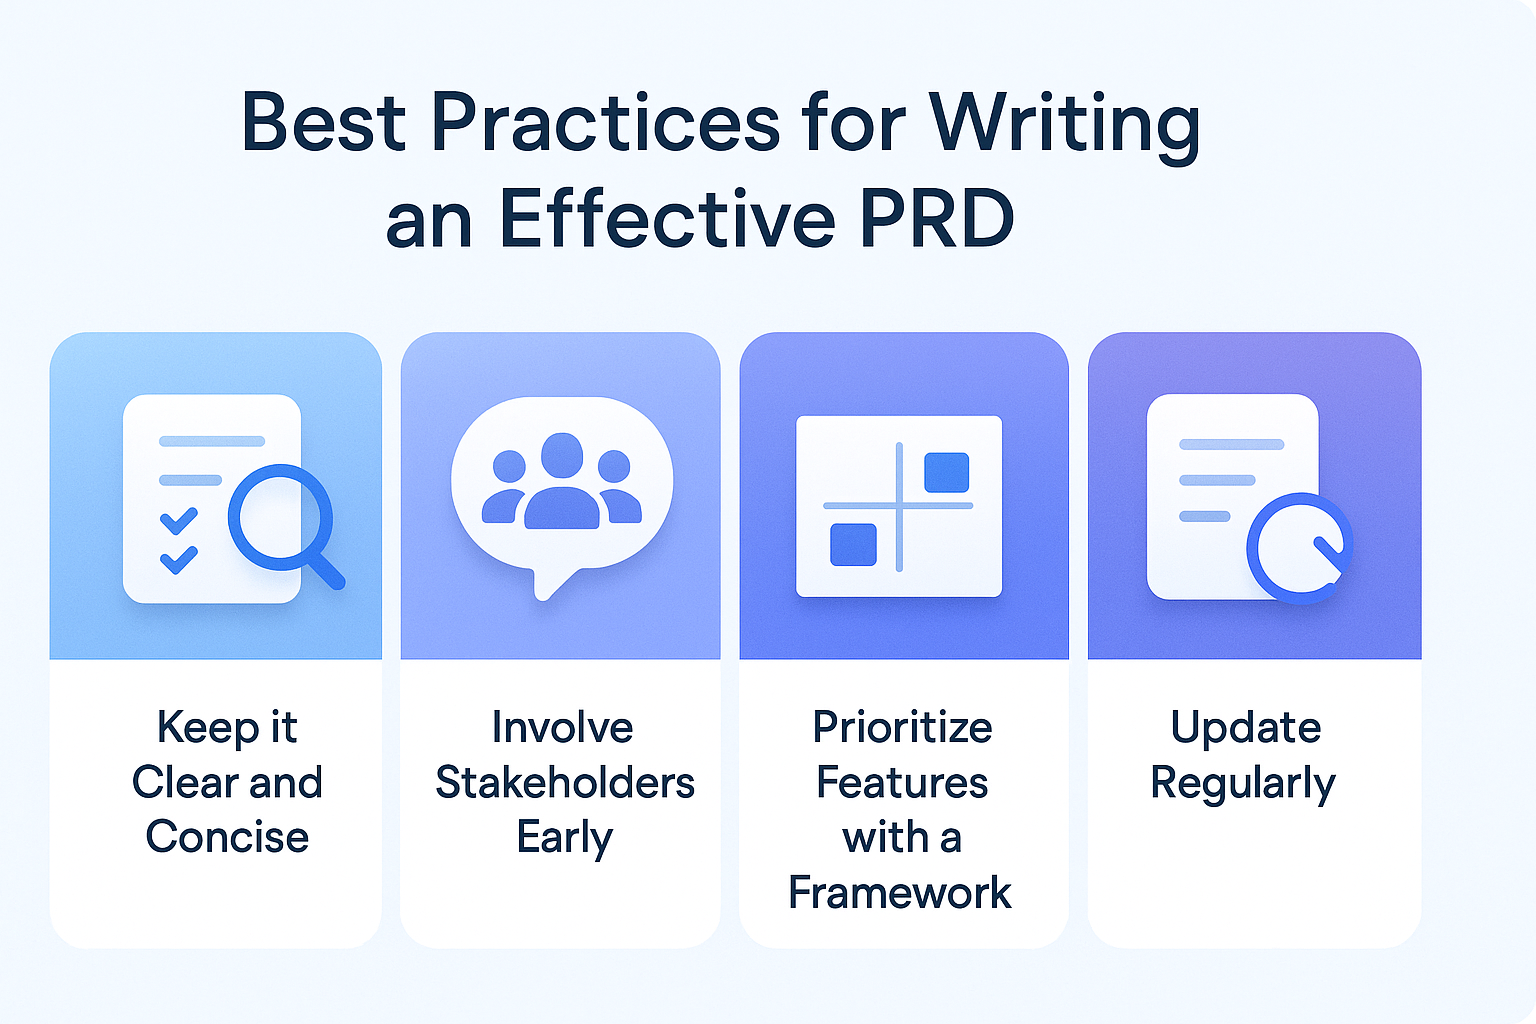 Best practices for writing a product requirement document
 These tips, drawn from product management expertise, will ensure your PRD is practical and effective.
Keep PRD clear and concise
A PRD should be easy to understand, and focused on what users need. Avoid technical terms or vague phrases. Instead, use simple language to describe features and goals. This clarity ensured her developers and designers knew exactly what to build.
Involve stakeholders early
Get feedback from product teams, developers, designers, and stakeholders at the start. Early input helps spot gaps and builds buy-in.
Suggested Read: 👉How to Write a Project Proposal 2025
When everyone gives input early, the PRD includes different perspectives, like designers looking at user flows and engineers pointing out technical issues.
Prioritize features with a framework
Use a prioritization framework like MoSCoW (Must-have, Should-have, Could-have, Won’t-have) to focus on what’s critical. Must-haves are non-negotiable. Should-haves add value but aren’t urgent. Could-haves are nice to have extras, and Won’t-haves are off the table for now. This keeps the focus on what matters most and prevents unnecessary work.
Update regularly
Products evolve, and so should your PRD. Revisit it when priorities shift, new feedback arises, or requirements change. In essence, regular updates ensure the PRD reflects current needs and decisions.
Why a great PRD (and Meegle) is the key to product team alignment
TL;DR
- A solid product requirements document (PRD) keeps teams aligned and focused. It reduces confusion, missed deadlines, or feature bloat.
- It’s the difference between wasting weeks on rework and shipping the right feature on time.
- A well-written PRD defines goals, prioritizes features, and helps manage changes without endless Slack threads and meetings.
- Product managers usually write the PRD, but a great PRD loop in design, engineering, and stakeholders early to avoid surprises later.
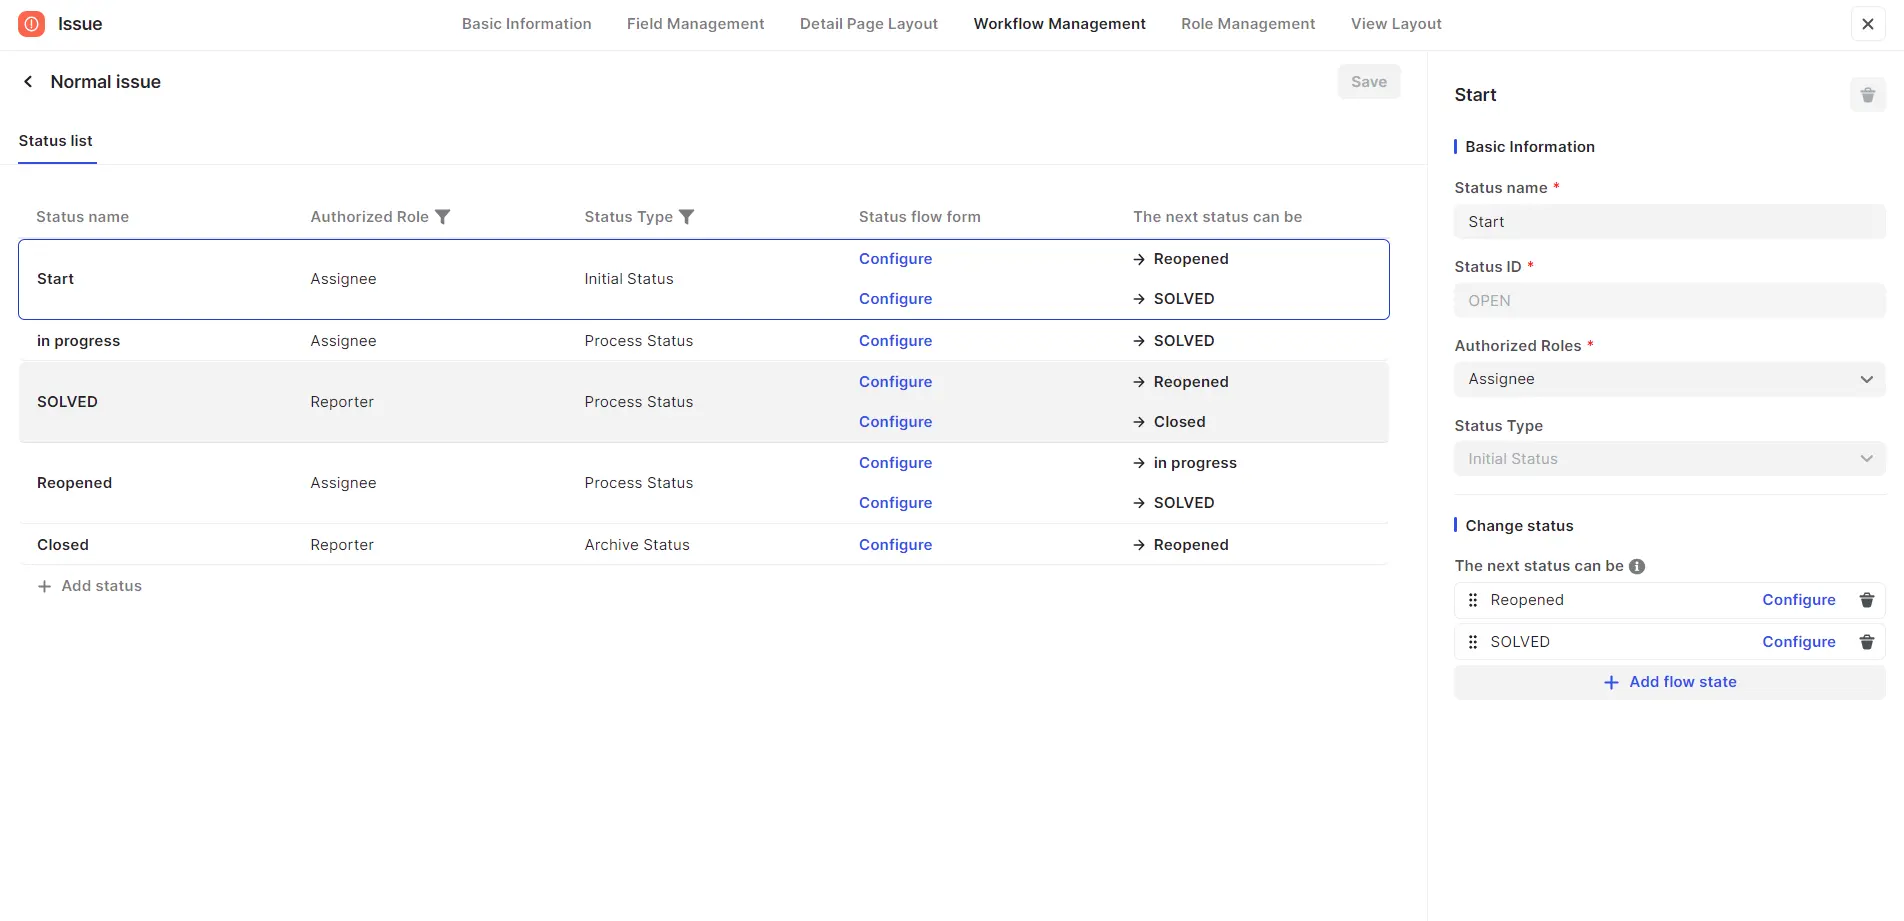 Workflow configuration in Meegle
- Meegle makes the whole process easier with customizable templates, a central dashboard, visual workflows, and version control.
Capture what matters—use Meegle to turn product requirements into action across your team.
FAQ
What is the main purpose of a PRD?
A PRD outlines a product’s purpose, features, and goals, aligning teams to build the right product. It acts as a shared playbook, so everyone works toward the same vision, reducing misalignment.
What key components should a PRD include?
A PRD includes goals, user stories, feature specs, non-functional requirements, acceptance criteria, timelines, dependencies, and personas. These ensure clarity, guiding teams to build aligned features and avoid confusion during development.
Who should write a PRD?
Product managers usually write PRDs, but designers, developers, marketing, QA, and stakeholders contribute. Early input, like designers ensuring usability, avoids surprises and aligns everyone on what’s being built and why.
How does a PRD differ from a BRD?
A PRD details features and user needs, while a BRD focuses on business goals, like boosting signups. The PRD turns BRD’s requirements into actionable plans for product development.
How can a PRD stay relevant during development?
Regularly update the PRD to reflect shifting priorities. Use clear language, involve stakeholders early, and apply frameworks like MoSCoW to keep it actionable, preventing outdated plans and ensuring team alignment.
The world’s #1 visualized project management tool
Powered by the next gen visual workflow engineRead More
Check All BlogsStart creating impactful work today
